Category: Main Dishes

  • Pork Coconut Stew: 7 Irresistible Secrets to a Delicious Tropical Feast

    Pork Coconut Stew: 7 Irresistible Secrets to a Delicious Tropical Feast

    Welcome, food lover! If you are looking for a fun and simple way to bring a tropical twist to your dinner table, you are in the right place. In this guide, you will learn how to create an amazing Pork Coconut Stew that is full of flavor, warmth, and a little bit of island magic. This recipe is designed to be easy to follow, even if you are new to cooking. With simple ingredients and clear steps, you can make this stew in your own kitchen. Let’s get started on your journey to a delightful meal!


    Why You Need This Pork Coconut Stew in Your Kitchen

    You might be wondering why you should try this Pork Coconut Stew recipe. Here are a few reasons:

    • Tropical Flavors: The mix of pork and creamy coconut milk brings a unique taste that feels like a mini vacation.
    • Easy to Make: The recipe is simple and clear, so you can cook it without any stress.
    • Nutrient-Rich: This stew has a good balance of protein, healthy fats, and vitamins to keep you energized.
    • Versatile Meal: It can be served as a hearty lunch or a satisfying dinner.

    This dish is perfect if you want to try something new and fun. Remember, cooking should be an adventure, and every step you take in the kitchen is a chance to learn something new!


    The Simple Ingredients You Will Need
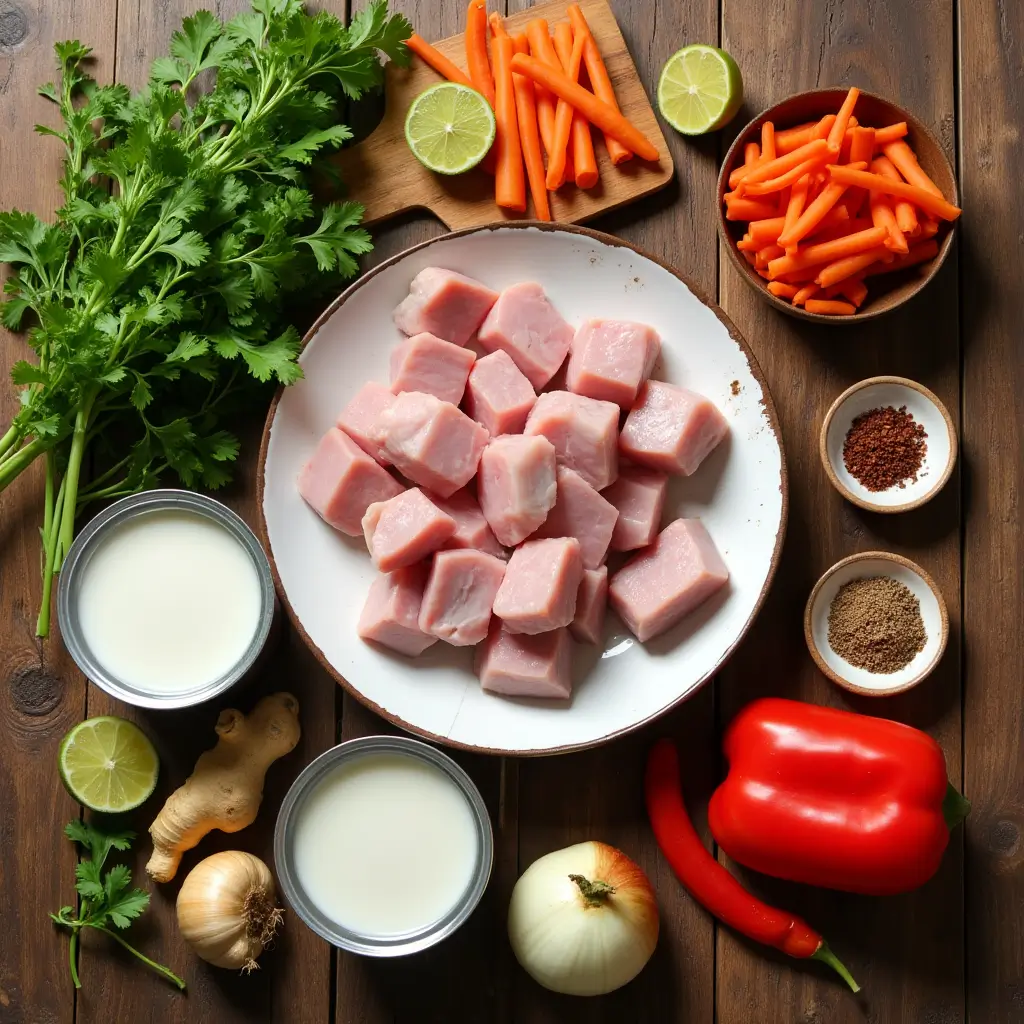
    Pork Coconut Stew  ingredients
    Pork Coconut Stew ingredients

    Before you start cooking, it is important to gather all your ingredients. Having everything ready makes cooking much smoother. For your Pork Coconut Stew, you will need:

    • Pork: Use tender cuts that can absorb the rich flavors.
    • Coconut Milk: This is the heart of the dish and gives it a creamy texture.
    • Fresh Vegetables: Think carrots, bell peppers, and onions for extra crunch and color.
    • Spices and Herbs: A blend of garlic, ginger, and a pinch of chili can make the dish pop.
    • Broth or Stock: To bring all the flavors together in a smooth, warm stew.

    Each ingredient plays a key role in making your stew a tasty treat. As you prepare, remember to use fresh and good quality produce for the best taste. You can also find organic versions at your local market.


    Step-by-Step Guide to Making Your Pork Coconut Stew

    Pork Coconut Stew instructions

    Now, let’s move on to the cooking part. Follow these easy steps to create your Pork Coconut Stew:

    1. Prepare Your Ingredients:
      • Cut the pork into bite-sized pieces.
      • Chop the vegetables into even pieces so they cook uniformly.
      • Mince the garlic and ginger.
    2. Brown the Pork:
      • In a large pot, heat a little oil.
      • Add your pork pieces and cook until they are lightly browned. This step helps to lock in the flavor.
    3. Sauté the Vegetables:
      • Once the pork is browned, add the onions, garlic, and ginger.
      • Let them cook until soft and fragrant.
    4. Mix in the Spices:
      • Add your spices and stir for a minute.
      • This is when you want to use your favorite blend that suits your taste.
    5. Add Coconut Milk and Broth:
      • Pour in the coconut milk and broth to cover all the ingredients.
      • Stir well so that the flavors mix nicely.
    6. Simmer Gently:
      • Reduce the heat and let the stew simmer.
      • This slow cook helps the pork become tender and the flavors to develop fully.
    7. Finish and Serve:
      • Taste your stew and adjust the seasoning if needed.
      • Serve hot with a side of rice or your favorite bread to soak up the sauce.

    Following these steps will ensure your Pork Coconut Stew turns out delicious and full of tropical delight!


    Expert Tips for Perfecting Your Pork Coconut Stew

    To make your Pork Coconut Stew even better, keep these simple tips in mind:

    • Prep Ahead: Get all your ingredients chopped and measured before you start cooking. This makes the process smooth and stress-free.
    • Low and Slow: Allow the stew to simmer gently. This helps the flavors to blend and the pork to become tender.
    • Taste as You Go: Check the seasoning throughout the cooking process. This way, you can adjust salt and spices to your liking.
    • Fresh is Best: Use fresh herbs and spices whenever possible to enhance the flavor.
    • Add a Squeeze of Lime: A little lime juice at the end can brighten the flavors and add a refreshing twist.

    With these tips, you will soon be a master at creating a perfect Pork Coconut Stew every time.


    Pairing Your Pork Coconut Stew with Perfect Sides

    A great stew deserves wonderful sides. Here are a few ideas to complement your Pork Coconut Stew:

    • Rice: A bowl of steamed jasmine or basmati rice is a classic pairing.
    • Bread: Crusty bread or a warm flatbread works well for dipping.
    • Salad: A fresh green salad with a light dressing can add a crunchy contrast.
    • Tropical Fruits: Pineapple or mango salsa can bring a burst of sweetness that enhances the dish.

    When you choose the right sides, you create a balanced meal that is both satisfying and exciting for your taste buds. For more ideas on side dishes, check out our Burger Bowl Recipe and Pickle Pie Pizza.


    Recommended Kitchen Tools and Must-Have Products

    To make this recipe even easier, you might want to invest in a few handy kitchen tools. Here are some products that can help you cook like a pro:

    • Heavy-Duty Pot: A good quality pot or Dutch oven is key for slow simmering. Look for a pot that retains heat well and is easy to clean.
    • Sharp Chef’s Knife: A reliable knife will help you chop your ingredients quickly and safely.
    • Measuring Cups and Spoons: Accurate measurements ensure your stew tastes just right every time.
    • Affiliate Pick: If you are looking for a versatile slow cooker, check out this Top-Rated Slow Cooker. that many chefs swear by. It is a great tool to help you achieve tender meat and blended flavors.

    These products not only make cooking easier but also enhance your overall kitchen experience. Investing in the right equipment can transform your home cooking into a delightful experience.


    External Resources for More Inspiration

    For further inspiration and additional cooking tips, you might want to explore some trusted sources:

    These websites offer a treasure trove of ideas that can help you experiment with flavors and techniques in your own kitchen.

    Explore More Delicious Recipes

    While you are on a culinary adventure, why not try more recipes from our kitchen? Here are a few of our favorite posts that you might enjoy:

    These internal links not only provide you with more exciting recipes but also help you get the most out of your cooking experience.


    Join Our Cooking Community!

    Now that you have all the secrets to make a delicious Pork Coconut Stew, it is your turn to bring this recipe to life. Share your cooking journey with us! Leave a comment below and tell us how your stew turned out, or post a picture on social media and tag us. We love to see your creations and hear about your experiences.

    If you have any questions or need more tips, do not hesitate to reach out. Join our community of food lovers and get access to more unique recipes, kitchen hacks, and special product offers. Your next great meal is just a recipe away!

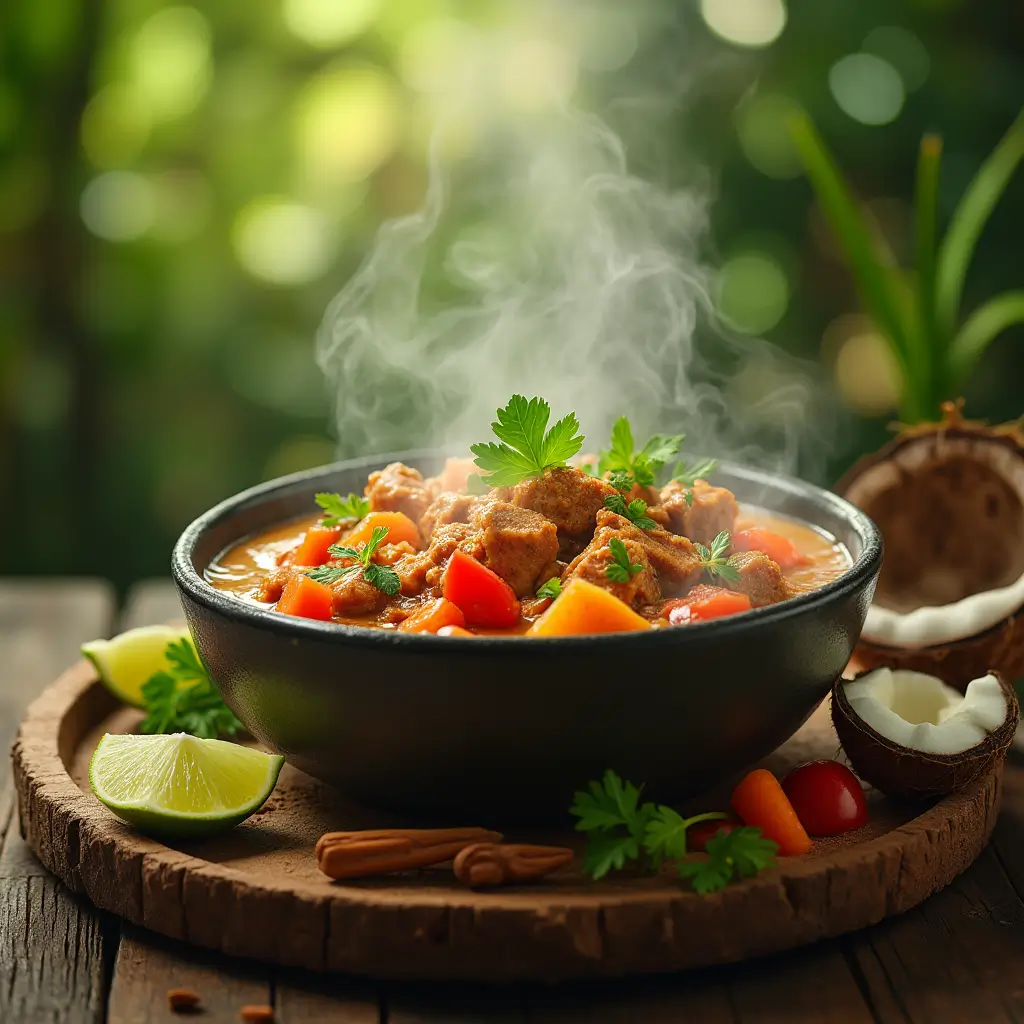
    Pork Coconut Stew

    A warm, hearty, and tropical Pork Coconut Stew that blends tender pork, rich coconut milk, and fresh vegetables into one satisfying dish. Perfect for a family dinner or a cozy night in!

    • Large heavy-duty pot or Dutch oven
    • Sharp chef’s knife
    • Cutting board
    • Measuring cups and spoons
    • 1 to 1.5 lbs of pork (shoulder or loin, cut into bite-sized pieces)
    • 2 cans (about 14 oz each of coconut milk (use full-fat for richer flavor))
    • 1 large onion (chopped)
    • 3 cloves garlic (minced)
    • 1 tablespoon fresh ginger (grated)
    • 2 carrots (peeled and sliced)
    • 1 red bell pepper (chopped)
    • 2 cups low-sodium chicken or vegetable broth
    • 1 teaspoon chili flakes (optional, for a slight kick)
    • Salt and pepper to taste
    • Fresh cilantro or parsley for garnish
    • Juice of 1 lime (optional for a zesty finish)

    Prepare the Ingredients:

    1. Chop the pork, vegetables, garlic, and ginger.
    2. Measure out the coconut milk and broth.

    Brown the Pork:

    1. Heat oil in your large pot over medium-high heat.
    2. Add the pork pieces and cook until they turn a light brown. Remove and set aside.

    Sauté the Vegetables:

    1. In the same pot, add the chopped onion, garlic, and ginger.
    2. Cook until the onions become soft and translucent.

    Combine and Simmer:

    1. Return the pork to the pot.
    2. Add the carrots and red bell pepper along with your spices.
    3. Pour in the coconut milk and broth, stirring well.

    Slow Cook:

    1. Reduce the heat to low.
    2. Let the stew simmer for 1 to 1.5 hours until the pork is tender and the flavors meld together.
    3. Stir occasionally to prevent sticking.

    Finish and Serve:

    1. Taste and adjust the seasoning with salt, pepper, and chili flakes if desired.
    2. Add a squeeze of lime juice just before serving.
    3. Garnish with fresh cilantro or parsley.
    • For extra depth of flavor, marinate the pork with salt, pepper, and a little garlic for 30 minutes before cooking.
    • If you prefer a thicker stew, let it simmer longer or mash a few vegetables into the broth.
    • Serve over rice or with a side of warm, crusty bread.
    Main Course
    Tropical/Caribbean
    Coconut Milk, Comfort Food, pork, salmon stew

    Enjoy making your Pork Coconut Stew and remember that each cooking step is a chance to add your own creative twist. Happy cooking, and don’t forget to share your delicious results with our community!
  • Effortless 5-Ingredient Pork Tenderloin and Rice Crock Pot Recipe with Hoisin Glaze

    Effortless 5-Ingredient Pork Tenderloin and Rice Crock Pot Recipe with Hoisin Glaze

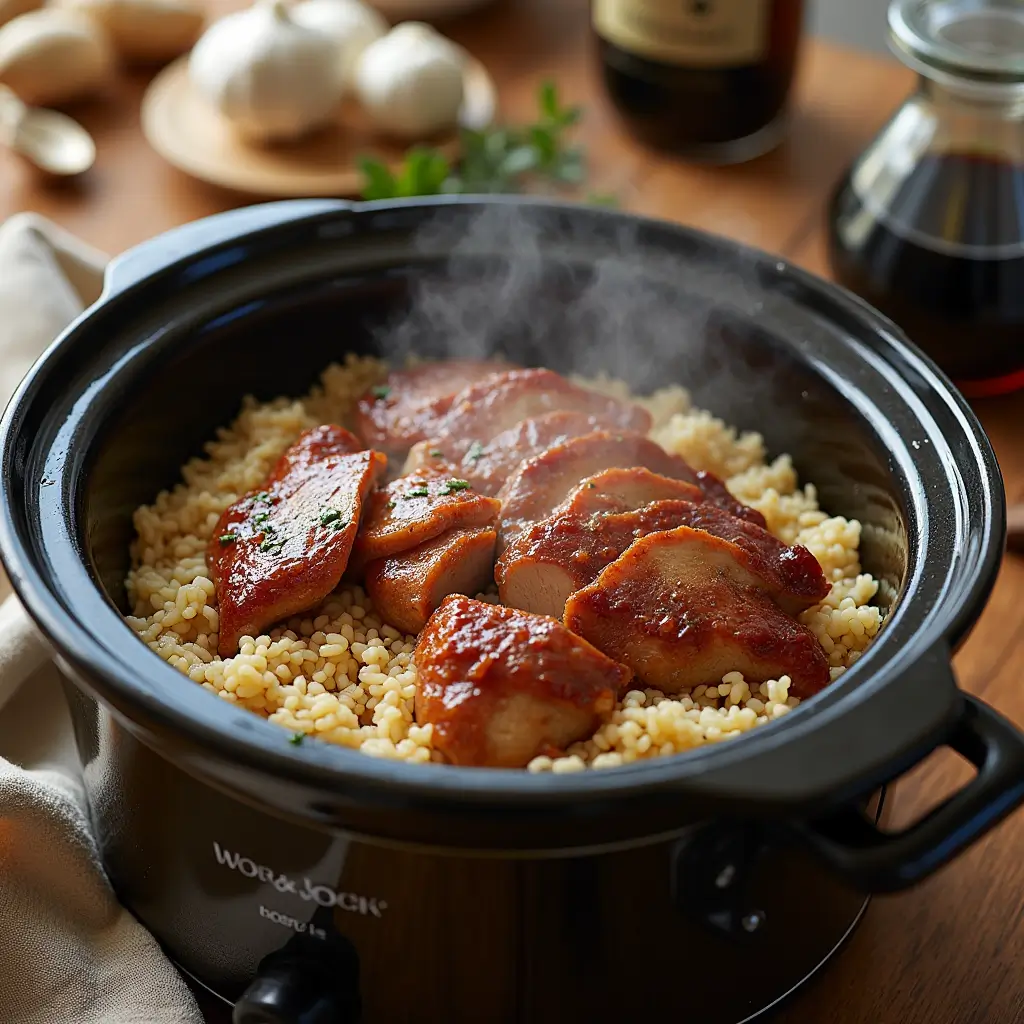
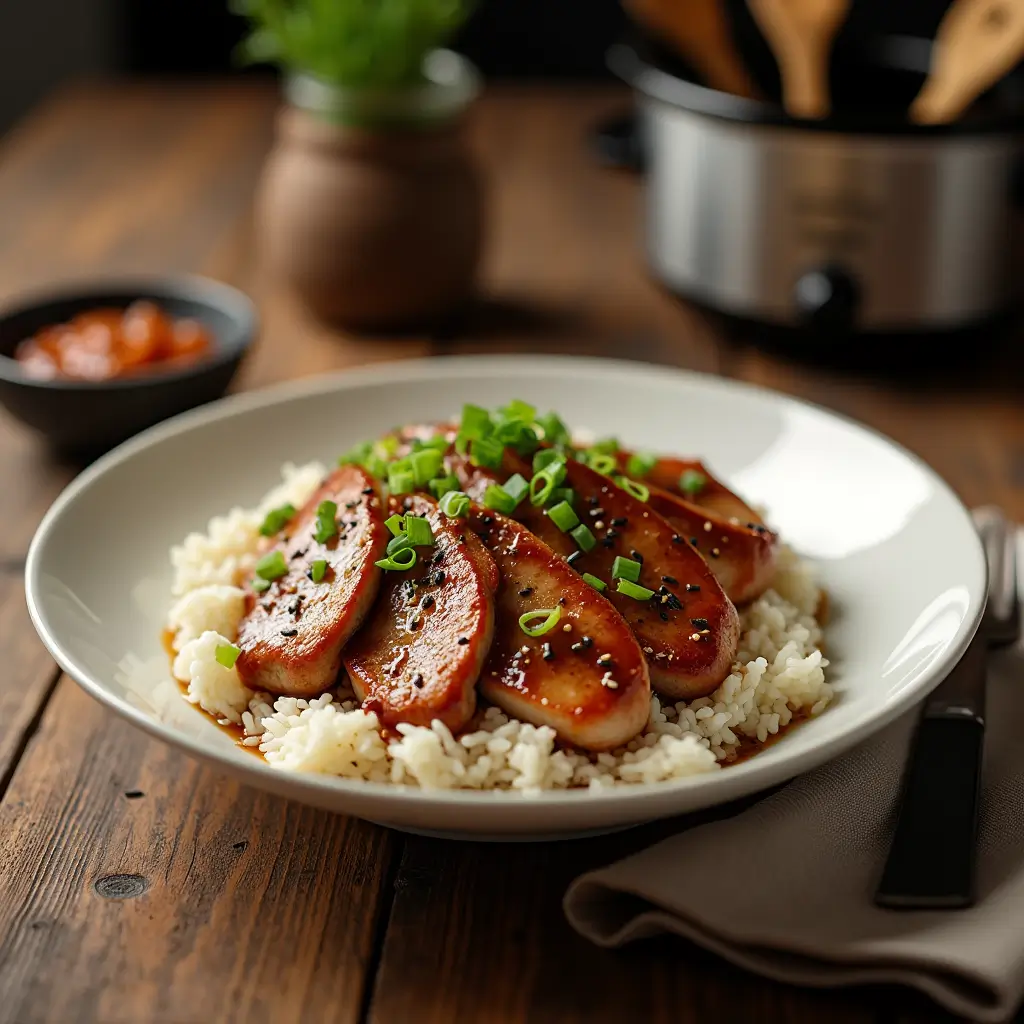
    Imagine coming home to a kitchen filled with the aroma of tender pork simmered in a sweet-savory hoisin glaze, served over fluffy rice. This pork tenderloin and rice crock pot recipe with hoisin is your ticket to a stress-free dinner that tastes like you spent hours cooking. Perfect for busy weeknights or lazy Sundays, this dish combines minimal prep with bold Asian-inspired flavors. Let’s dive in!


    Why You’ll Love This Pork Tenderloin and Rice Crock Pot Recipe 13

    • Hands-off cooking: Let your crock pot do the work while you tackle your day.
    • Budget-friendly: Uses affordable ingredients like pork tenderloin and pantry staples.
    • Versatile: Pair with stir-fried veggies, noodles, or even stuff into tacos.
    • Meal-prep hero: Leftovers taste even better the next day!

    For more cozy dinner ideas, try our Cheesy Chicken Sloppy Joe or Chinese Dishes Using Italian Basil.


    Ingredients for Hoisin-Glazed Pork Tenderloin & Rice

    (Serves 4–6) 13

    Essential Ingredients

    • 2 lbs pork tenderloin (trimmed of fat)
    • 1 cup jasmine rice (rinsed; substitute with brown rice for a nuttier flavor)
    • ½ cup hoisin sauce (like Kikkoman for gluten-free options)
    • ¼ cup low-sodium soy sauce
    • 3 cloves garlic (minced)
    • 1 tbsp fresh ginger (grated)

    Flavor Boosters (Optional)

    • 1 tbsp honey or brown sugar
    • 1 tsp sesame oil
    • Red pepper flakes for heat

    How to Make Hoisin Pork Tenderloin in Your Crock Pot 15

    Step 1: Prep the Pork & Rice

    1. Layer the rice: Spray your crock pot with non-stick oil. Spread rinsed rice evenly at the bottom.
    2. Season the pork: Rub the tenderloin with salt, pepper, and half the minced garlic. Place it on top of the rice.

    Step 2: Mix the Hoisin Glaze

    In a bowl, whisk together hoisin sauce, soy sauce, honey, ginger, remaining garlic, and ½ cup water. Pour this over the pork.

    Step 3: Cook Low & Slow

    • Low setting: 6 hours (ideal for all-day cooking).
    • High setting: 3.5–4 hours (perfect for quicker meals).

    Pro Tip: Use a meat thermometer to ensure the pork reaches 145°F internally 1.

    Step 4: Thicken the Sauce (Optional)

    Remove the pork, shred or slice it, then mix 1 tbsp cornstarch with 2 tbsp sauce. Stir into the crock pot and cook 15 more minutes on high for a glossy glaze.

    Crock Pot Cooking Process
    Crock Pot Cooking Process
    Close-Up of Hoisin Glaze

    Serving Suggestions & Pairings

    • Over rice: Fluff the cooked rice from the crock pot and top with pork.
    • With veggies: Serve alongside Glazed Green Beans or a crisp Asian slaw.
    • In tacos: Stuff into tortillas with pickled veggies.
    • Drink pairing: Try a refreshing Matcha Milk Tea or Golden Stormry Cocktail.

    Pork Tenderloin and Rice Crock Pot with Hoisin

    A melt-in-your-mouth pork tenderloin slow-cooked with jasmine rice in a tangy hoisin glaze.

    • 6-quart slow cooker
    • Meat thermometer

    Essential Ingredients

    • 2 lbs pork tenderloin (trimmed of fat)
    • 1 cup jasmine rice (rinsed; substitute with brown rice for a nuttier flavor)
    • ½ cup hoisin sauce (like Kikkoman for gluten-free options)
    • ¼ cup low-sodium soy sauce
    • 3 cloves garlic (minced)
    • 1 tbsp fresh ginger (grated)

    Flavor Boosters (Optional)

    • 1 tbsp honey or brown sugar
    • 1 tsp sesame oil
    • Red pepper flakes for heat
    1. Layer rice in the crock pot. Season pork and place on top.
    2. Mix hoisin, soy sauce, honey, garlic, ginger, and water. Pour over pork.
    3. Cook on low 6 hours or high 4 hours.
    4. Optional: Thicken sauce with cornstarch.
    • Storage: Keep leftovers in an airtight container for up to 3 days.

    • Substitutions: Use chicken broth instead of water for richer rice.

    Main Course
    Asian
    pork, Pork Tenderloin, pork with rice, rice, Rice Crock Pot with Hoisin

    Final Tips & Call to Action

    Hungry for more? Explore our Salmon Stew Recipe or German Thanksgiving Dishes for hearty meal ideas.

    Let’s Connect! Tried this recipe? Tag @fouziaskitchen on Instagram with #CrockPotMagic. We’d love to see your creations!

    Affiliate Disclosure: This post contains affiliate links. Purchasing via these links supports our site at no extra cost to you.


    By blending simplicity with bold flavors, this pork tenderloin and rice crock pot recipe with hoisin is sure to become a household favorite. Happy slow cooking! 🍚🐖

  • Irresistible 20-Minute Burger Bowl Recipe: Healthy, Customizable & Bursting with Flavor

    Irresistible 20-Minute Burger Bowl Recipe: Healthy, Customizable & Bursting with Flavor

    Tired of the same old burgers but craving that smoky, savory flavor? Meet your new weeknight hero: the burger bowl recipe! This deconstructed burger is quicker than delivery, healthier than fast food, and endlessly customizable. As a chef and meal prep fanatic, I’ll guide you through building a vibrant, protein-packed bowl that’s as fun to make as it is to eat.

    Why You’ll Love This Burger Bowl Recipe

    • 20-minute magic: Faster than waiting in a drive-thru.
    • Healthier twist: Skip the bun, load up on veggies.
    • Meal prep superstar: Assemble bowls ahead for grab-and-go lunches.
    • Kid-approved: Let everyone build their own masterpiece.

    For more quick dinner inspo, try my Easy Baked Taco Lasagna or Garlic Butter Shrimp.


    How to Build the Perfect Burger Bowl (Step-by-Step)

    Ingredients You’ll Need

    (Affiliate links included for kitchen tools I personally use and recommend)

    • 1 lb ground beef (80/20 blend for juiciness)
    • 1 tbsp Smoky BBQ Seasoning (my favorite affiliate product!)
    • 1 cup cherry tomatoes, halved
    • 1 avocado, sliced (use this avocado slicer for perfect cuts)
    • Pickles, red onion, lettuce, shredded cheese
    • Secret sauce: Mix mayo, ketchup, and a dash of hot sauce

    Equipment


    Burger Bowl Variations for Every Craving

    1. Low-carb: Swap rice for cauliflower rice (try my Vegan Chinese Squash Kabocha as a base).
    2. Breakfast twist: Add a fried egg and crispy bacon.
    3. Tex-Mex: Use taco seasoning and top with 7-Layer Dip.

    Pair it with a refreshing Matcha Milk Tea or Iced Americano.

    Burger Bowl Recipe

    A deconstructed burger packed with juicy beef, fresh veggies, and zesty sauce – ready in 20 minutes!

    • 1 lb ground beef
    • 1 tsp garlic powder
    • 1 tsp smoked paprika
    • 1 cup shredded lettuce
    • ½ cup shredded cheddar
    • ¼ cup pickles
    • 1 cup cooked rice or greens
    1. Brown beef in skillet with seasonings (5-7 mins).
    2. Assemble bowls: base, beef, veggies, cheese.
    3. Drizzle with sauce.

    Meal prep components in these containers for 3-day freshness!

    Main Course
    American
    burger bowl, Gluten-Free, healthy dinner, quick meal

    Final Touches & Serving Suggestions

    Crumble some crispy bacon over the top or add pickled jalapeños for heat. Serve with Southern Cornbread or Mini Cream Puffs for dessert.


    Tried this burger bowl recipe? Tag @FouziasKitchen on Instagram or share your creation below! Need more inspiration? Explore our Main Dishes category!

  • 7 Crazy-Good Pickle Pie Pizza Recipes: A Tangy Twist You’ll Love!

    7 Crazy-Good Pickle Pie Pizza Recipes: A Tangy Twist You’ll Love!

    Why You’ll Love This Pickle Pie Pizza

    If you’re a fan of bold flavors and unique food combinations, this pickle pie pizza is for you! It’s the perfect blend of tangy pickles, creamy cheese, and a crispy crust that will leave your taste buds begging for more. Whether you’re hosting a game night or just craving something different, this recipe is a guaranteed crowd-pleaser.

    For more creative dishes, check out my Easy Baked Taco Lasagna or Garlic Butter Shrimp.


    What Is Pickle Pie Pizza?

    Pickle pie pizza is a quirky, delicious mashup of two beloved foods: pizza and pickles. It features a crispy pizza crust topped with a creamy base, tangy pickles, and a blend of cheeses. The result is a savory, tangy, and slightly sweet dish that’s unlike anything you’ve tried before.


    Why Pickles on Pizza?

    Pickles add a tangy crunch that cuts through the richness of the cheese and cream, creating a perfectly balanced flavor profile. If you’re a pickle fan, you’ll love this unexpected twist on pizza. And if you’re skeptical, trust me—this combo works!


    Ingredients You’ll Need

    Here’s what you’ll need to make this unique dish:

    • Pizza Dough: Store-bought or homemade.
    • Cream Cheese: For a rich, creamy base.
    • Pickles: Dill pickles, sliced thin.
    • Cheese: A mix of mozzarella and cheddar for gooey goodness.
    • Garlic Powder: Adds a hint of savory flavor.
    • Dill: Fresh or dried, for an herby finish.

    Equipment You’ll Need

    • Baking sheet or pizza stone
    • Rolling pin
    • Mixing bowls
    • Knife and cutting board

    Step-by-Step Instructions

    1. Prep the Dough: Roll out your pizza dough on a floured surface.
    2. Make the Creamy Base: Mix cream cheese, garlic powder, and a pinch of salt until smooth.
    3. Assemble the Pizza: Spread the cream cheese mixture over the dough, then layer on pickles and cheese.
    4. Bake: Bake at 425°F (220°C) for 12-15 minutes or until the crust is golden and the cheese is bubbly.
    5. Garnish and Serve: Sprinkle with fresh dill, slice, and enjoy!

    Tips for Perfect Pickle Pie Pizza

    • Use Quality Pickles: The better the pickles, the better the pizza.
    • Don’t Overload the Toppings: Keep it balanced to avoid a soggy crust.
    • Experiment with Cheese: Try adding gouda or feta for extra flavor.

    Serving Suggestions

    This pizza is perfect on its own, but you can also:


    Nutrition Facts (Per Serving)

    • Calories: 280
    • Fat: 14g
    • Carbs: 28g
    • Protein: 10g

    Recipe Variations

    • Spicy Pickle Pizza: Add jalapeños or hot sauce for a kick.
    • Vegan Pickle Pizza: Use vegan cream cheese and dairy-free cheese.
    • Meat Lover’s Pickle Pizza: Add crispy bacon or ham for extra protein.

    Pickle Pie Pizza: A Tangy Twist on a Classic

    This pickle pie pizza combines tangy pickles, creamy cheese, and a crispy crust for a unique and delicious dish.

    • Baking sheet or pizza stone
    • Rolling Pin
    • Mixing bowls
    • Knife and cutting board
    • 1 pizza dough (store-bought or homemade)
    • 1/2 cup cream cheese (softened)
    • 1/2 tsp garlic powder
    • 1 cup dill pickles (thinly sliced)
    • 1 cup shredded mozzarella cheese
    • 1/2 cup shredded cheddar cheese
    • Fresh dill for garnish
    1. Preheat oven to 425°F (220°C).
    2. Roll out pizza dough on a floured surface.
    3. In a bowl, mix cream cheese, garlic powder, and a pinch of salt until smooth.
    4. Spread the cream cheese mixture over the dough.
    5. Layer pickles and cheeses on top.
    6. Bake for 12-15 minutes or until the crust is golden and the cheese is bubbly.
    7. Garnish with fresh dill, slice, and serve.
    Main Course, main dish
    American
    Pickle pie pizza, pickle recipes, tangy pizza, unique pizza recipes

    Have you ever tried pickle pie pizza? Share your thoughts in the comments below! Don’t forget to pin this recipe for later and follow me on social media for more unique and delicious recipes.

  • Hearty Salmon Stew Recipe: A 5-Star Comfort Food for Seafood Lovers

    Hearty Salmon Stew Recipe: A 5-Star Comfort Food for Seafood Lovers

    Hearty Salmon Stew Recipe: A Bowl of Comfort in Every Bite

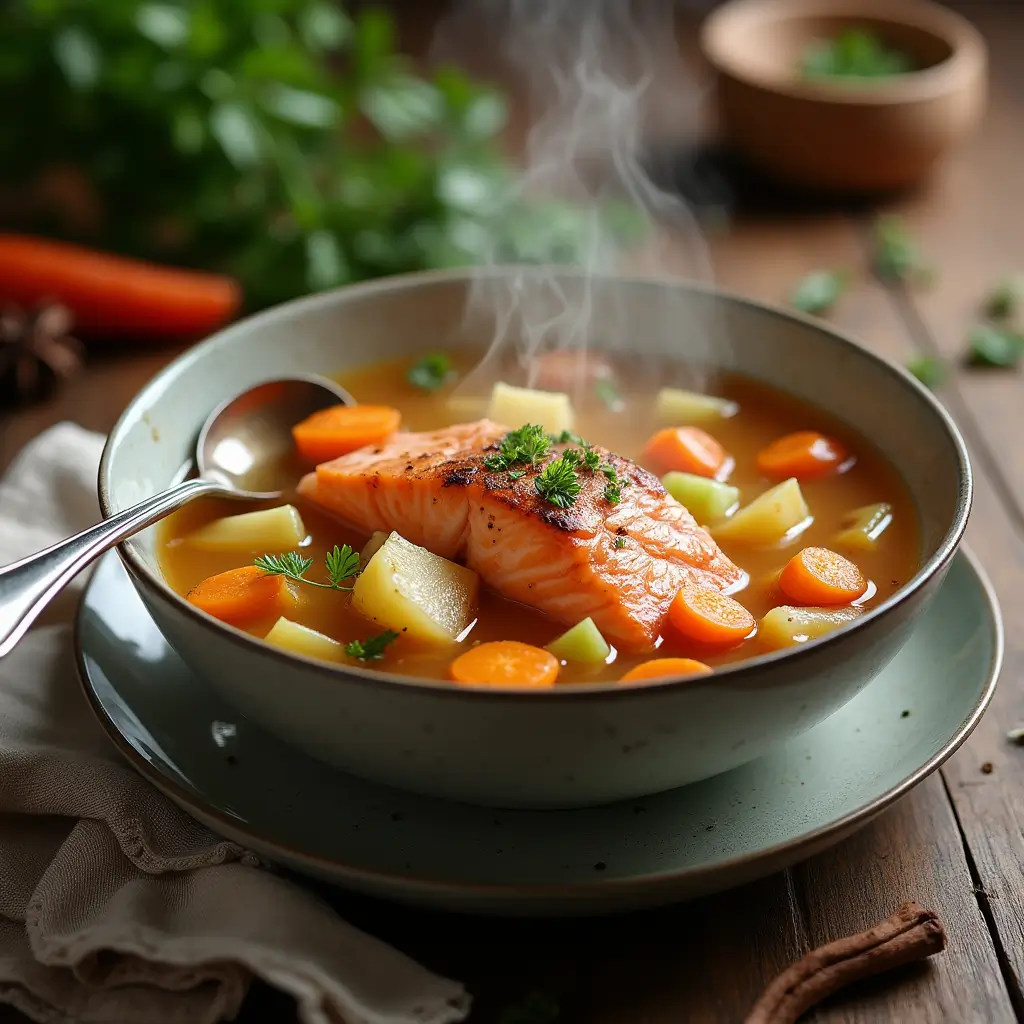
    When the weather turns chilly or you’re craving something warm and comforting, nothing hits the spot like a bowl of hearty salmon stew. This 5-star salmon stew recipe is packed with tender salmon, wholesome vegetables, and a rich, flavorful broth that will make you feel like you’re dining at a seaside bistro.

    Whether you’re a seafood enthusiast or just looking for a new way to enjoy salmon, this recipe is for you. It’s easy to make, uses simple ingredients, and is perfect for weeknight dinners or special occasions. Let’s dive in!


    Why You’ll Love This Salmon Stew

    • Rich and flavorful: A savory broth infused with herbs and spices.
    • Nutritious and filling: Packed with protein, veggies, and healthy fats.
    • Easy to make: Ready in under an hour with minimal prep.
    • Versatile: Customize with your favorite vegetables or spices.

    What Makes Salmon Stew Special?

    Salmon stew is a classic dish that combines the richness of salmon with the heartiness of a stew. The tender chunks of salmon melt in your mouth, while the vegetables add texture and depth. It’s a one-pot wonder that’s both comforting and elegant, making it perfect for any occasion.


    Ingredients You’ll Need

    Here’s what you’ll need to make this hearty salmon stew recipe:

    • 1 lb fresh salmon fillets (skinless, cut into chunks)
    • 2 tbsp olive oil
    • 1 onion (diced)
    • 2 garlic cloves (minced)
    • 2 carrots (sliced)
    • 2 celery stalks (chopped)
    • 1 cup potatoes (diced)
    • 4 cups fish or vegetable broth
    • 1 cup diced tomatoes (canned or fresh)
    • 1 tsp smoked paprika
    • 1 tsp dried thyme
    • 1 bay leaf
    • Salt and pepper to taste
    • Fresh parsley (for garnish)

    Equipment Needed


    Step-by-Step Instructions

    Step 1: Sauté the Vegetables

    Heat the olive oil in a large pot over medium heat. Add the onion, garlic, carrots, and celery. Sauté for 5-7 minutes until the vegetables are softened.

    Step 2: Add the Broth and Seasonings

    Pour in the fish or vegetable broth, diced tomatoes, smoked paprika, thyme, and bay leaf. Stir well and bring to a gentle simmer.

    Step 3: Add the Potatoes

    Add the diced potatoes to the pot and cook for 10-12 minutes until they start to soften.

    Step 4: Cook the Salmon

    Gently place the salmon chunks into the stew. Cook for 5-7 minutes until the salmon is opaque and flakes easily with a fork.

    Step 5: Season and Serve

    Remove the bay leaf and season the stew with salt and pepper to taste. Garnish with fresh parsley and serve hot.


    Tips for Success

    • Use fresh salmon: Fresh fillets have the best flavor and texture.
    • Don’t overcook the salmon: Add it last to keep it tender and flaky.
    • Customize your stew: Add spinach, corn, or your favorite veggies.

    Serving Suggestions

    Pair your salmon stew with:


    Why This Recipe Works

    This hearty salmon stew recipe is designed to be foolproof. The combination of fresh ingredients and simple steps ensures a flavorful, comforting dish every time. Plus, it’s versatile enough to adapt to your preferences, making it a go-to recipe for any occasion.

    This hearty salmon stew recipe is the ultimate comfort food. With tender salmon, wholesome vegetables, and a rich broth, it’s perfect for cozy nights or family dinners.

    • Large pot or Dutch oven
    • Wooden spoon
    • Knife and cutting board
    • 1 lb fresh salmon fillets (skinless, cut into chunks)
    • 2 tbsp olive oil
    • 1 onion (diced)
    • 2 garlic cloves (minced)
    • 2 carrots (sliced)
    • 2 celery stalks (chopped)
    • 1 cup potatoes (diced)
    • 4 cups fish or vegetable broth
    • 1 cup diced tomatoes (canned or fresh)
    • 1 tsp smoked paprika
    • 1 tsp dried thyme
    • 1 bay leaf
    • Salt and pepper to taste
    • Fresh parsley (for garnish)
    1. Sauté the vegetables in olive oil until softened.
    2. Add broth, tomatoes, and seasonings. Simmer.
    3. Add potatoes and cook until tender.
    4. Gently add salmon and cook until flaky.
    5. Season, garnish, and serve.
    Main Course
    American
    Comfort Food, healthy dinner, salmon stew, seafood stew

    Did you try this hearty salmon stew recipe? Let me know how it turned out in the comments below! Don’t forget to share this recipe with your friends and family. For more delicious recipes, check out our main dishes category.

    Happy cooking! 🐟🍲

  • 5-Star King Salmon Recipe: The Ultimate Guide to Perfectly Flaky, Flavorful Fish

    5-Star King Salmon Recipe: The Ultimate Guide to Perfectly Flaky, Flavorful Fish

    The Ultimate King Salmon Recipe: A Chef’s Secret to Flaky, Flavorful Fish

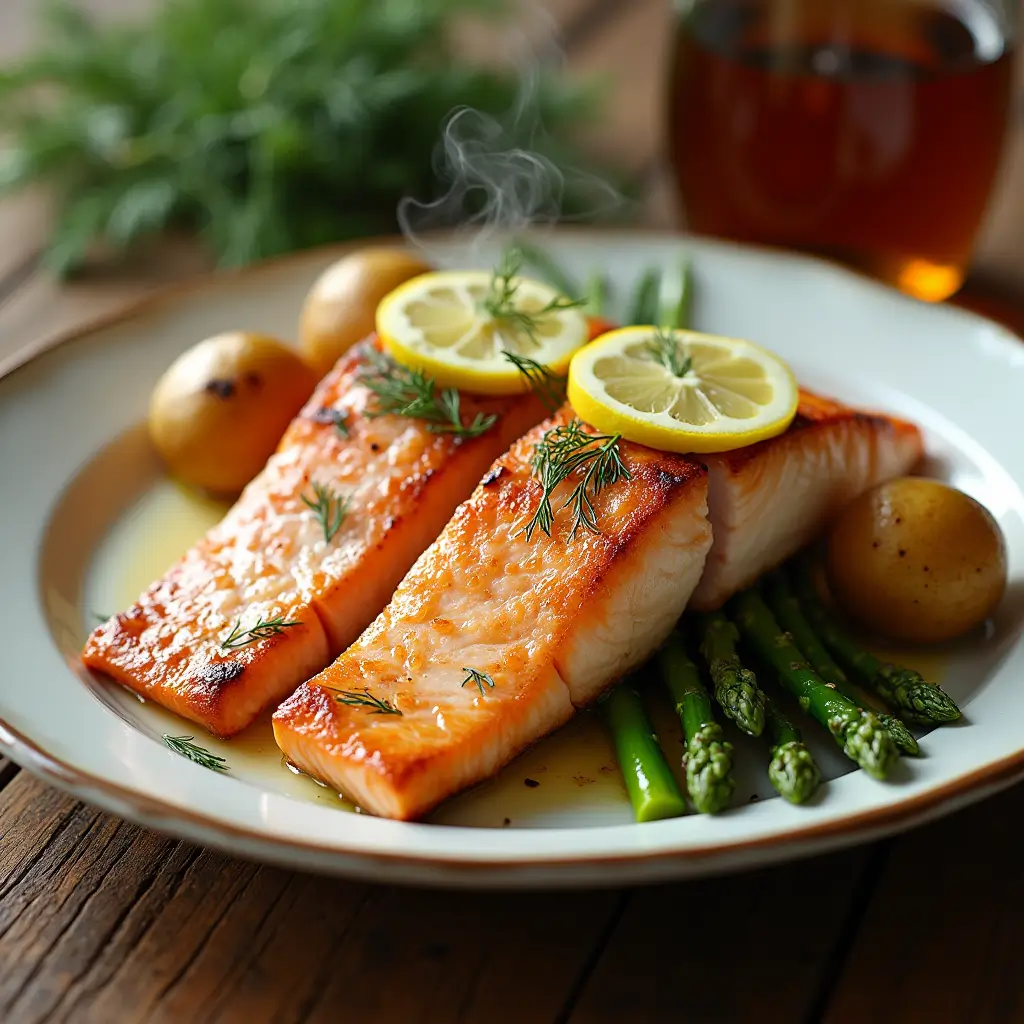
    If you’re a seafood lover, you know there’s nothing quite like a perfectly cooked piece of king salmon. Its rich, buttery flavor and melt-in-your-mouth texture make it a favorite for special occasions and weeknight dinners alike. But here’s the thing: cooking salmon can be tricky. Overcook it, and it turns dry; undercook it, and it’s not safe to eat.

    That’s where this 5-star king salmon recipe comes in. I’m here to guide you step-by-step to create a dish that’s restaurant-quality but easy enough for anyone to make at home. Whether you’re a seasoned chef or a beginner in the kitchen, this recipe will become your go-to for impressing guests or treating yourself.


    Why You’ll Love This King Salmon Recipe

    • Perfectly cooked every time: Say goodbye to dry, overcooked salmon.
    • Simple ingredients: No fancy tools or hard-to-find items.
    • Versatile: Pair it with your favorite sides or enjoy it on its own.
    • Healthy and delicious: Packed with omega-3s and flavor.

    What Makes King Salmon Special?

    King salmon, also known as Chinook salmon, is the largest and most prized species of Pacific salmon. Its high fat content gives it a luxurious, buttery texture and rich flavor that sets it apart from other types of salmon. It’s perfect for grilling, baking, or pan-searing, making it a versatile choice for any meal.


    Ingredients You’ll Need

    Here’s what you’ll need to make this 5-star king salmon recipe:

    • 2 king salmon fillets (about 6 oz each)
    • 2 tbsp olive oil
    • 1 tsp sea salt
    • 1 tsp black pepper
    • 1 tsp garlic powder
    • 1 tsp smoked paprika
    • 1 lemon (sliced for garnish)
    • Fresh dill or parsley (optional, for garnish)

    Equipment Needed


    Step-by-Step Instructions

    Step 1: Preheat and Prep

    Preheat your oven to 375°F (190°C). Line a baking sheet with parchment paper to prevent sticking.

    Step 2: Season the Salmon

    In a small bowl, mix the sea salt, black pepper, garlic powder, and smoked paprika. Brush the salmon fillets with olive oil, then generously season both sides with the spice mix.

    Step 3: Bake to Perfection

    Place the seasoned salmon fillets on the prepared baking sheet. Bake for 12-15 minutes, depending on the thickness of the fillets. The salmon is done when it flakes easily with a fork.

    Step 4: Garnish and Serve

    Remove the salmon from the oven and let it rest for 2-3 minutes. Garnish with fresh lemon slices and dill or parsley. Serve immediately and enjoy!


    Tips for Success

    • Don’t overcook: Salmon cooks quickly, so keep an eye on it to avoid drying it out.
    • Use fresh salmon: Fresh fillets have the best flavor and texture.
    • Experiment with flavors: Try adding a honey glaze or a sprinkle of chili flakes for a twist.

    Serving Suggestions

    Pair your king salmon with:


    Why This Recipe Works

    This 5-star king salmon recipe is designed to be foolproof. The combination of simple spices and precise cooking times ensures that your salmon turns out perfectly every time. Plus, it’s versatile enough to pair with almost any side dish, making it a great addition to your recipe collection.

    5-Star King Salmon Recipe

    This 5-star king salmon recipe is the ultimate guide to cooking flaky, flavorful salmon at home. With simple ingredients and easy steps, you’ll have a restaurant-quality dish in no time.

    • Baking sheet
    • Parchment paper
    • Mixing bowl
    • Basting brush
    • 2 king salmon fillets (about 6 oz each)
    • 2 tbsp olive oil
    • 1 tsp sea salt
    • 1 tsp black pepper
    • 1 tsp garlic powder
    • 1 tsp smoked paprika
    • 1 lemon (sliced for garnish)
    • Fresh dill or parsley (optional, for garnish)
    1. Preheat oven to 375°F (190°C).
    2. Line a baking sheet with parchment paper.
    3. Mix spices in a bowl and season the salmon.
    4. Bake for 12-15 minutes.
    5. Garnish and serve.
    Main Course
    American
    baked salmon, healthy dinner, king salmon, seafood recipe

    Did you try this 5-star king salmon recipe? Let me know how it turned out in the comments below! Don’t forget to share this recipe with your friends and family. For more delicious recipes, check out our main dishes category.

    Happy cooking! 🐟✨

  • 5 Irresistible Chinese Dishes Using Italian Basil You Need to Try

    5 Irresistible Chinese Dishes Using Italian Basil You Need to Try

    When you think of Chinese cuisine, basil might not be the first herb that comes to mind. But trust me, Italian basil adds a fresh, aromatic twist to classic Chinese dishes that will blow your taste buds away. Whether you’re a fan of stir-fries, noodles, or soups, these recipes are easy to make and bursting with flavor.

    In this post, I’ll show you how to use Italian basil to elevate your favorite Chinese dishes. Let’s get cooking!


    Why Italian Basil Works in Chinese Cuisine

    Italian basil has a sweet, slightly peppery flavor that pairs beautifully with the bold, savory tastes of Chinese cooking. It adds a fresh, herbaceous note that brightens up dishes like stir-fries, soups, and even dumplings. Plus, it’s super versatile—you can use it as a garnish or cook it into the dish for a deeper flavor.


    1. Basil Chicken Stir-Fry

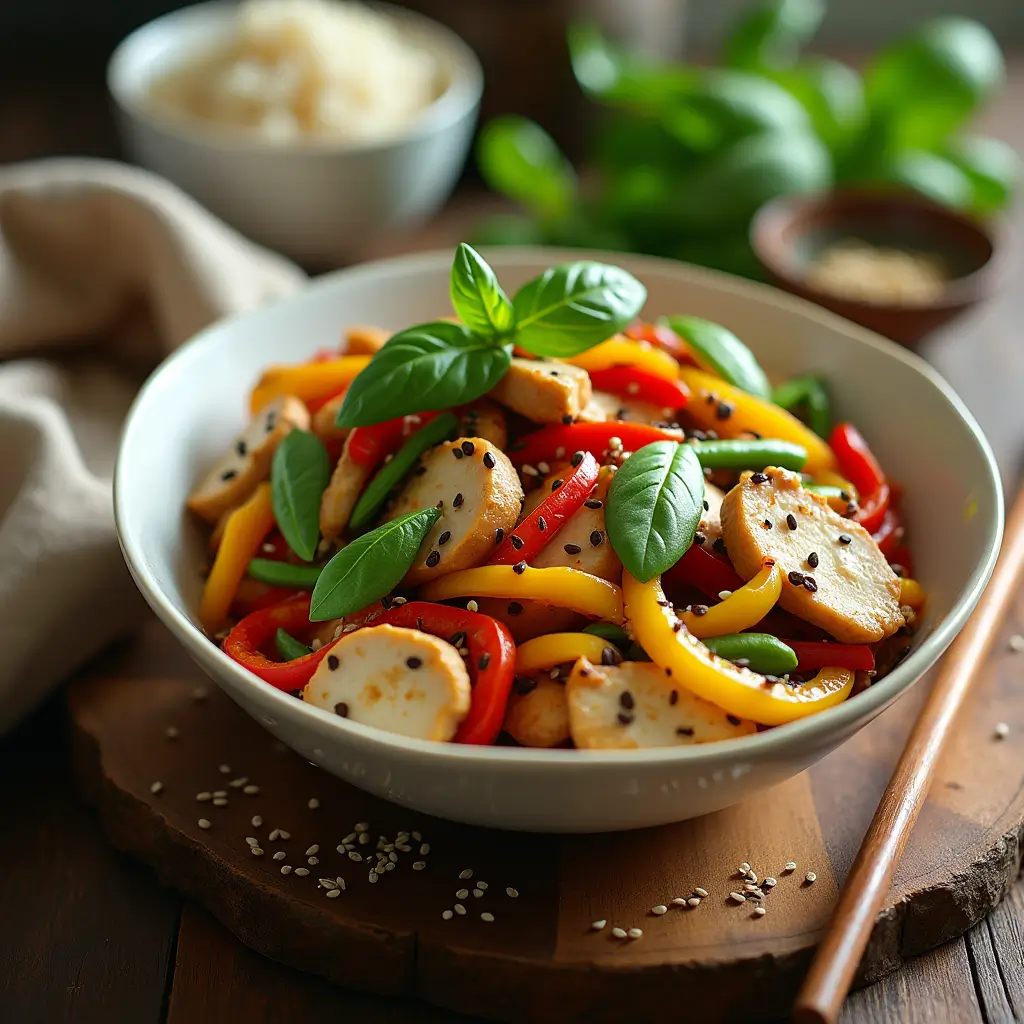
    This quick and easy stir-fry is a weeknight lifesaver. Tender chicken, crisp veggies, and fragrant Italian basil come together in a savory sauce that’s irresistible.

    Why You’ll Love It:

    • Ready in under 30 minutes.
    • Packed with flavor and nutrients.

    Pro Tip: Serve it over steamed rice or noodles for a complete meal.


    2. Basil Garlic Shrimp Noodles

    These noodles are a garlic lover’s dream. Juicy shrimp, chewy noodles, and fresh basil make this dish a standout.

    Why You’ll Love It:

    • Perfect for a quick lunch or dinner.
    • The basil adds a refreshing twist.

    Affiliate Recommendation: Use a high-quality wok for the best stir-fry results.


    3. Basil Egg Drop Soup

    This comforting soup gets an upgrade with the addition of Italian basil. It’s light, flavorful, and ready in just 15 minutes.

    Why You’ll Love It:

    • A comforting dish for chilly days.
    • The basil adds a fresh, aromatic touch.

    4. Basil Beef Dumplings

    These homemade dumplings are filled with savory beef and fragrant basil. They’re perfect for steaming, frying, or boiling.

    Why You’ll Love It:

    • Fun to make and even more fun to eat.
    • The basil adds a unique flavor to the filling.

    5. Basil Fried Rice

    Turn leftover rice into a flavorful meal with this basil fried rice recipe. It’s quick, easy, and packed with veggies and protein.

    Why You’ll Love It:

    • A great way to use up leftovers.
    • The basil adds a fresh, herbaceous note.

    Basil Chicken Stir-Fry

    This basil chicken stir-fry is quick, easy, and packed with flavor. Perfect for a weeknight dinner!

    • Wok or large skillet
    • Knife and cutting board
    • 1 lb chicken breast (thinly sliced)
    • 2 tbsp soy sauce
    • 1 tbsp oyster sauce
    • 1 tbsp cornstarch
    • 2 tbsp vegetable oil
    • 3 garlic cloves (minced)
    • 1 red bell pepper (sliced)
    • 1 cup snap peas
    • 1 cup fresh Italian basil leaves
    1. In a bowl, marinate the chicken with soy sauce, oyster sauce, and cornstarch for 10 minutes.
    2. Heat the oil in a wok over high heat. Add the garlic and stir-fry for 30 seconds.
    3. Add the chicken and cook until browned, about 5 minutes.
    4. Toss in the bell pepper and snap peas, and stir-fry for 2-3 minutes.
    5. Remove from heat and stir in the basil leaves.
    6. Serve immediately with steamed rice.
    • Add chili flakes for a spicy kick.

    • Substitute chicken with tofu for a vegetarian version.

    Main Course
    Chinese
    Chinese-Inspired, Main Dish

    Final Thoughts

    Italian basil is a game-changer in Chinese cooking. Its fresh, aromatic flavor adds a unique twist to classic dishes, making them even more delicious. Whether you try the basil chicken stir-fry or the basil fried rice, these recipes are sure to impress.

     Have you tried cooking with Italian basil? Share your favorite recipes in the comments below, and don’t forget to pin this post for later!


    By incorporating Italian basil into your Chinese dishes, you’ll create meals that are both familiar and exciting. Happy cooking!

  • 5 Mouthwatering German Thanksgiving Dishes You Need to Try This Year

    5 Mouthwatering German Thanksgiving Dishes You Need to Try This Year

    Thanksgiving is all about gathering around the table with loved ones and enjoying a feast that warms the heart. But why not spice things up this year with German Thanksgiving dishes? German cuisine is known for its hearty, comforting flavors that perfectly complement the cozy vibes of Thanksgiving. In this post, I’ll guide you through 5 must-try German Thanksgiving dishes that will make your holiday meal unforgettable.

    Whether you’re a seasoned chef or a beginner in the kitchen, these recipes are easy to follow and packed with flavor. Let’s dive in!


    Why German Dishes Are Perfect for Thanksgiving

    German food is all about comfort. Think rich flavors, hearty ingredients, and dishes that bring people together. From savory roasts to sweet desserts, German cuisine has something for everyone. Plus, many German recipes are surprisingly simple to make, so you can spend less time in the kitchen and more time enjoying the holiday.


    1. German-Style Roast Turkey with Herb Butter

    No Thanksgiving is complete without a turkey, and this German-inspired version is a game-changer. The secret? A flavorful herb butter made with thyme, rosemary, and garlic, rubbed under the skin for maximum juiciness.

    Why You’ll Love It:

    • The herb butter keeps the turkey moist and adds a burst of flavor.
    • It’s a show-stopping centerpiece for your Thanksgiving table.

    Pro Tip: Serve it with a side of German White Asparagus for a truly authentic experience.


    2. Sausage and Apple Stuffing

    Move over, traditional stuffing! This German-inspired version combines savory sausage, sweet apples, and a hint of sage for a dish that’s both sweet and savory.

    Why You’ll Love It:

    • The combination of sausage and apples is a match made in heaven.
    • It’s a great way to use up leftover bread.

    3. Kartoffelpuffer (German Potato Pancakes)

    These crispy potato pancakes are a crowd-pleaser and a fantastic side dish for your Thanksgiving spread. Serve them with a dollop of sour cream or applesauce for a delicious contrast.

    Why You’ll Love It:

    • They’re crispy on the outside and tender on the inside.
    • Perfect for using up leftover potatoes.

    Pro Tip: Pair them with a refreshing drink like Horchata Drink Mix to balance the richness.


    4. Red Cabbage with Apples (Rotkohl)

    This sweet and tangy side dish is a staple in German cuisine. The combination of red cabbage, apples, and a touch of vinegar creates a flavor profile that pairs perfectly with roast turkey.

    Why You’ll Love It:

    • It’s a colorful addition to your Thanksgiving table.
    • The sweet and tangy flavors complement rich dishes beautifully.

    5. German Apple Strudel (Apfelstrudel)

    End your meal on a sweet note with this classic German dessert. Flaky pastry filled with spiced apples and raisins, served warm with a scoop of vanilla ice cream—it’s pure comfort in every bite.

    Why You’ll Love It:

    • It’s easier to make than you think!
    • The warm, spiced filling is perfect for fall.

    Affiliate Recommendation: Use a non-stick baking mat to make rolling the strudel a breeze.

    German-Style Roast Turkey with Herb Butter

    This German-inspired roast turkey is juicy, flavorful, and perfect for your Thanksgiving feast. The herb butter adds a delicious twist that will have your guests coming back for seconds.

    • Roasting pan
    • Meat thermometer
    • Basting brush
    • 1 whole turkey (12-14 lbs)
    • 1 cup unsalted butter (softened)
    • 2 tbsp fresh thyme (chopped)
    • 2 tbsp fresh rosemary (chopped)
    • 4 cloves garlic (minced)
    • Salt and pepper to taste
    1. Preheat your oven to 325°F (165°C).
    2. In a bowl, mix the softened butter, thyme, rosemary, garlic, salt, and pepper.
    3. Gently loosen the skin of the turkey and spread the herb butter underneath.
    4. Place the turkey in a roasting pan and cook for about 3 hours, basting occasionally.
    5. Use a meat thermometer to ensure the internal temperature reaches 165°F (74°C).
    6. Let the turkey rest for 20 minutes before carving.
    • For extra flavor, stuff the turkey cavity with lemon halves and fresh herbs.

    • Save the turkey drippings to make a delicious gravy.

    Main Course
    German
    German Cuisine, Main Dish, Thanksgiving

    These German Thanksgiving dishes are sure to add a unique and delicious twist to your holiday feast. Whether you’re trying the herb-butter turkey or the sweet Apfelstrudel, your guests will be impressed by the flavors and creativity.

    Have you tried any of these recipes? Share your experience in the comments below, and don’t forget to pin this post for later!


    By combining traditional Thanksgiving elements with German flavors, you’ll create a meal that’s both familiar and exciting. Happy cooking!

  • 5-Star Beef Short Ribs with Oxtail Seasoning Recipe: A Flavor Bomb You’ll Love

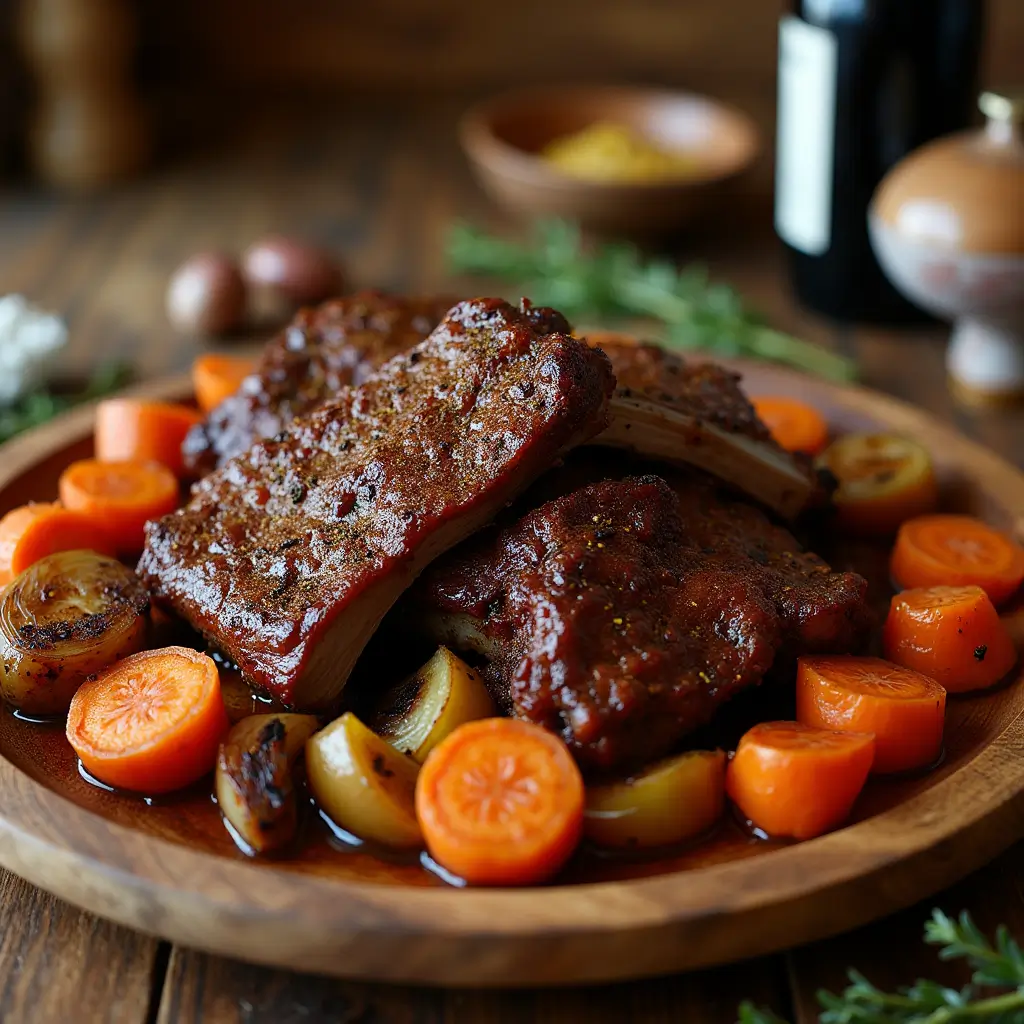
    5-Star Beef Short Ribs with Oxtail Seasoning Recipe: A Flavor Bomb You’ll Love

    What Makes Oxtail Seasoning So Special?

    Oxtail seasoning is a blend of herbs and spices traditionally used to enhance the flavor of oxtail dishes. It typically includes ingredients like garlic, thyme, allspice, and paprika, which add a warm, aromatic depth to the meat. When used on beef short ribs, it creates a bold, savory crust that’s absolutely irresistible.


    Ingredients You’ll Need

    Here’s what you’ll need to make these mouthwatering beef short ribs:

    • 3-4 lbs beef short ribs
    • 2 tablespoons oxtail seasoning
    • 1 tablespoon smoked paprika
    • 1 tablespoon garlic powder
    • 1 tablespoon onion powder
    • 1 teaspoon black pepper
    • 1 teaspoon salt
    • 2 tablespoons olive oil
    • 1 cup beef broth
    • 1 cup red wine (optional, but recommended)
    • 4 carrots, peeled and chopped
    • 4 celery stalks, chopped
    • 1 large onion, sliced
    • 4 garlic cloves, minced
    • 2 sprigs fresh thyme
    • 2 sprigs fresh rosemary

    Step-by-Step Instructions

    1. Preheat Your Oven: Start by preheating your oven to 325°F (163°C).
    2. Season the Ribs: Pat the beef short ribs dry with paper towels. In a small bowl, mix the oxtail seasoning, smoked paprika, garlic powder, onion powder, black pepper, and salt. Rub the seasoning mixture all over the ribs, making sure they’re evenly coated.
    3. Sear the Ribs: Heat olive oil in a large Dutch oven or oven-safe pot over medium-high heat. Sear the ribs on all sides until they develop a deep brown crust (about 3-4 minutes per side). Remove the ribs and set them aside.
    4. Sauté the Vegetables: In the same pot, add the carrots, celery, onion, and garlic. Cook for 5-7 minutes, stirring occasionally, until the vegetables are softened and fragrant.
    5. Deglaze the Pot: Pour in the beef broth and red wine, scraping the bottom of the pot to release any browned bits. This adds incredible flavor to the dish.
    6. Braise the Ribs: Return the ribs to the pot, nestling them into the vegetables. Add the thyme and rosemary sprigs. Cover the pot with a lid and transfer it to the oven.
    7. Cook Low and Slow: Let the ribs cook for 3-4 hours, or until they’re fork-tender. Check the ribs occasionally and add more broth if needed to keep them moist.
    8. Rest and Serve: Remove the ribs from the oven and let them rest for 15 minutes before serving. This allows the juices to redistribute, ensuring a moist and flavorful dish. Serve with the vegetables and pan juices.

    Tips for the Best Beef Short Ribs

    • Choose Quality Ribs: Look for well-marbled short ribs for the best flavor and tenderness.
    • Don’t Skip the Sear: Searing creates a flavorful crust and locks in moisture.
    • Use Fresh Herbs: Thyme and rosemary add a wonderful aroma and depth to the dish.

    Why This Recipe Works

    This beef short ribs recipe is a winner because it combines simplicity with incredible flavor. The oxtail seasoning adds a unique, savory twist, while the slow braising process ensures the ribs are tender and juicy. It’s a foolproof method that delivers restaurant-quality results every time.


    Pairing Suggestions

    These beef short ribs pair beautifully with:

    Creamy Mashed Potatoes: A classic comfort food combo.

    • Roasted Garlic Green Beans: A fresh, flavorful side.
    • Crusty Bread: Perfect for soaking up the delicious pan juices.

    To make this recipe even easier, here are a few tools and ingredients I recommend:

    • Dutch Oven: Perfect for searing and braising. Buy it here.
    • Meat Thermometer: Ensures your ribs are cooked to perfection. Buy it here.
    • Oxtail Seasoning: High-quality seasoning for the best flavor. Buy it here.

    Beef Short Ribs with Oxtail Seasoning

    Tender, flavorful ribs that are perfect for a hearty meal.

    • Dutch oven or oven-safe pot
    • Meat thermometer
    • Cutting board
    • 3-4 lbs beef short ribs
    • 2 tablespoons oxtail seasoning
    • 1 tablespoon smoked paprika
    • 1 tablespoon garlic powder
    • 1 tablespoon onion powder
    • 1 teaspoon black pepper
    • 1 teaspoon salt
    • 2 tablespoons olive oil
    • 1 cup beef broth
    • 1 cup red wine (optional)
    • 4 carrots (peeled and chopped)
    • 4 celery stalks (chopped)
    • 1 large onion (sliced)
    • 4 garlic cloves (minced)
    • 2 sprigs fresh thyme
    • 2 sprigs fresh rosemary
    1. Preheat oven to 325°F (163°C).
    2. Season the ribs with oxtail seasoning, smoked paprika, garlic powder, onion powder, black pepper, and salt.
    3. Sear the ribs in olive oil until browned on all sides.
    4. Sauté carrots, celery, onion, and garlic in the same pot.
    5. Deglaze with beef broth and red wine.
    6. Return the ribs to the pot, add herbs, and cover.
    7. Braise in the oven for 3-4 hours until tender.
    8. Rest for 15 minutes before serving.
    Main Course
    American
    beef short ribs, oxtail seasoning, slow-cooked beef, tender ribs

    Have you tried this beef short ribs recipe? Share your thoughts in the comments below! Don’t forget to pin this recipe for later and follow us for more delicious ideas. Happy cooking!

  • How to Cook the Perfect Beef Arm Roast: A Foolproof Recipe for Tender, Flavorful Meat

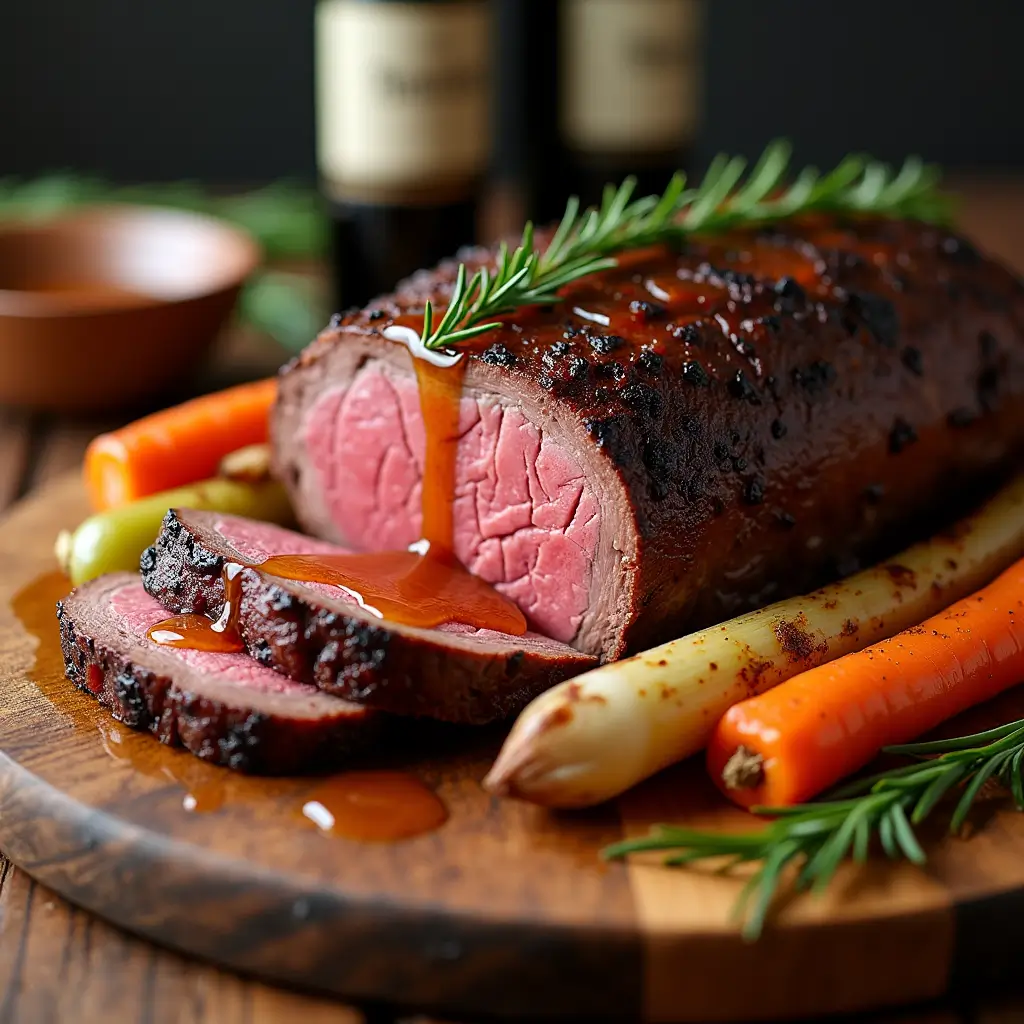
    How to Cook the Perfect Beef Arm Roast: A Foolproof Recipe for Tender, Flavorful Meat

    Why This Beef Arm Roast Recipe is a Must-Try

    If you’ve ever wondered how to turn a humble beef arm roast into a show-stopping meal, you’re in the right place. This beef arm roast recipe is all about simplicity and flavor. With a few basic ingredients and a little patience, you can create a tender, juicy roast that’s perfect for Sunday dinners, holidays, or any time you crave comfort food. The best part? It’s nearly impossible to mess up!


    What Makes Beef Arm Roast So Special?

    The beef arm roast comes from the shoulder of the cow, which means it’s a tougher cut with tons of flavor. When cooked low and slow, it transforms into a melt-in-your-mouth masterpiece. This recipe uses a combination of searing and braising to lock in moisture and create a rich, savory dish that’s sure to impress. Plus, it’s an affordable alternative to pricier cuts like ribeye or tenderloin.


    Ingredients You’ll Need

    Here’s what you’ll need to make this mouthwatering beef arm roast:

    • 3-4 lbs beef arm roast
    • 2 tablespoons olive oil
    • 1 tablespoon kosher salt
    • 1 tablespoon freshly ground black pepper
    • 1 tablespoon garlic powder
    • 1 tablespoon onion powder
    • 1 teaspoon smoked paprika (for a hint of smokiness)
    • 2 cups beef broth (low-sodium preferred)
    • 1 cup dry red wine (optional, but highly recommended)
    • 4 large carrots, peeled and cut into chunks
    • 4 celery stalks, chopped
    • 1 large yellow onion, sliced
    • 4 garlic cloves, minced
    • 2 sprigs fresh rosemary
    • 2 sprigs fresh thyme

    Step-by-Step Instructions

    1. Preheat Your Oven: Start by preheating your oven to 325°F (163°C).
    2. Prepare the Roast: Pat the beef arm roast dry using paper towels. This helps the seasoning stick better. In a small bowl, combine salt, black pepper, garlic powder, onion powder, and smoked paprika. Generously rub this mixture all over the roast, ensuring every part is evenly coated for maximum flavor.
    3. Sear to Perfection: Heat a Dutch oven or heavy pot over medium-high heat. Add the roast and sear it on all sides until it forms a rich, golden-brown crust. This step should take about 3-4 minutes per side and is key to locking in the juices and enhancing the flavor.
    4. Cook the Vegetables: In the same pot, toss in the chopped carrots, celery, onion, and minced garlic. Sauté them for 5-7 minutes, stirring occasionally, until they become tender and release a delicious aroma. This builds a flavorful base for the roast.
    5. Deglaze the Pot: Pour in the beef broth and red wine, scraping the bottom of the pot to release any browned bits. This adds incredible flavor to the dish.
    6. Braise the Roast: Return the roast to the pot, nestling it into the vegetables. Add the rosemary and thyme sprigs. Cover the pot with a lid and transfer it to the oven.
    7. Cook Low and Slow: Let the roast cook for 3-4 hours, or until it’s fork-tender. Check the roast occasionally and add more broth if needed to keep it moist.
    8. Rest and Slice: Once the roast is done cooking, take it out of the oven and let it rest for 15 minutes. This crucial step allows the juices to settle back into the meat, ensuring every slice is moist and flavorful. Serve the roast with the tender vegetables and drizzle with the savory pan juices for an extra burst of flavor.

    Tips for the Best Beef Arm Roast

    • Choose Quality Meat: Look for a well-marbled arm roast for the best flavor and tenderness.
    • Don’t Rush the Sear: Searing creates a flavorful crust and locks in moisture. Take your time to get it right.
    • Use Fresh Herbs: Rosemary and thyme add a wonderful aroma and depth to the dish.

    Why This Recipe Works

    This beef arm roast recipe is a winner because it combines simplicity with incredible flavor. The slow braising process breaks down the tough fibers in the meat, resulting in a tender, juicy roast that’s packed with savory goodness. It’s a foolproof method that delivers restaurant-quality results every time.


    Pairing Suggestions

    This beef arm roast pairs beautifully with:

    • Creamy Polenta: A smooth, buttery side that complements the rich flavors of the roast.
    • Roasted Garlic Green Beans: A fresh, flavorful addition to your meal.
    • Crusty Bread: Perfect for soaking up the delicious pan juices.

    To make this recipe even easier, here are a few tools and ingredients I recommend:

    • Dutch Oven: Perfect for searing and braising. Buy it here.
    • Meat Thermometer: Ensures your roast is cooked to perfection. Buy it here.
    • Red Wine: Adds depth and richness to the dish. Buy it here.

    Perfect Beef Arm Roast

    A tender, juicy roast that’s perfect for family dinners or special occasions.

    • Dutch oven or oven-safe pot
    • Meat thermometer
    • Cutting board
    • 3-4 lbs beef arm roast
    • 2 tablespoons olive oil
    • 1 tablespoon kosher salt
    • 1 tablespoon freshly ground black pepper
    • 1 tablespoon garlic powder
    • 1 tablespoon onion powder
    • 1 teaspoon smoked paprika
    • 2 cups beef broth
    • 1 cup dry red wine (optional)
    • 4 large carrots (peeled and cut into chunks)
    • 4 celery stalks (chopped)
    • 1 large yellow onion (sliced)
    • 4 garlic cloves (minced)
    • 2 sprigs fresh rosemary
    • 2 sprigs fresh thyme
    1. Preheat oven to 325°F (163°C).
    2. Pat the roast dry and coat it evenly with the seasoning mixture.
    3. Sear the roast in olive oil until golden-brown on all sides.
    4. Sauté carrots, celery, onion, and garlic in the same pot.
    5. Deglaze with beef broth and red wine.
    6. Return the roast to the pot, add herbs, and cover.
    7. Braise in the oven for 3-4 hours until tender.
    8. Rest for 15 minutes before slicing and serving.
    Main Course
    American
    beef arm roast, family dinner, slow-cooked beef, tender roast recipe

    Have you tried this beef arm roast recipe? Share your thoughts in the comments below! Don’t forget to pin this recipe for later and follow us for more delicious ideas. Happy cooking!

  • 5-Ingredient Easy Baked Taco Lasagna (No Browning Ground Beef Needed!)

    5-Ingredient Easy Baked Taco Lasagna (No Browning Ground Beef Needed!)

    Why You’ll Love This Easy Baked Taco Lasagna

    If you’re looking for a quick, delicious, and fuss-free dinner, this easy baked taco lasagna is your answer. The best part? You don’t even need to brown the ground beef! This recipe combines the flavors of tacos and lasagna into one cheesy, comforting dish that’s perfect for busy weeknights or feeding a crowd. Plus, it’s made with just 5 simple ingredients—yes, you read that right!


    What Makes This Recipe So Easy?

    The secret to this recipe is skipping the step of browning the ground beef. Instead, you’ll use pre-seasoned taco meat or a quick mix of taco seasoning and raw ground beef, which cooks perfectly as the lasagna bakes. This saves time and cleanup, making it a go-to recipe for busy families. Layers of tortillas, cheese, and flavorful meat create a dish that’s hearty, satisfying, and oh-so-easy to make.


    Ingredients You’ll Need

    Here’s what you’ll need to make this easy baked taco lasagna:

    • 1 lb ground beef (no need to pre-cook!)
    • 1 packet taco seasoning (or 2 tablespoons homemade taco seasoning)
    • 1 cup salsa (mild or spicy, depending on your preference)
    • 8-10 small flour tortillas (or corn tortillas for a gluten-free option)
    • 2 cups shredded cheese (cheddar, Mexican blend, or your favorite)
    • Optional toppings: sour cream, diced tomatoes, green onions, cilantro

    Step-by-Step Instructions

    1. Preheat Your Oven: Start by preheating your oven to 375°F (190°C).
    2. Prepare the Meat Mixture: In a bowl, combine the raw ground beef, taco seasoning, and salsa. Mix well until the beef is evenly coated.
    3. Layer the Lasagna: In a 9×13-inch baking dish, spread a thin layer of the meat mixture on the bottom. Place a layer of tortillas over the meat, cutting them to fit if needed. Add another layer of meat mixture, followed by a sprinkle of cheese. Repeat the layers until all ingredients are used, finishing with a layer of cheese on top.
    4. Bake: Cover the dish with foil and bake for 25 minutes. Remove the foil and bake for an additional 10-15 minutes, or until the cheese is bubbly and golden.
    5. Serve and Enjoy: Let the lasagna cool for 5 minutes before slicing. Serve with your favorite toppings like sour cream, diced tomatoes, or fresh cilantro.

    Tips for the Best Taco Lasagna

    • Use High-Quality Salsa: The salsa adds moisture and flavor, so choose one you love.
    • Customize the Heat: Adjust the spiciness by using mild or hot salsa and taco seasoning.
    • Make It Ahead: Assemble the lasagna ahead of time and refrigerate until ready to bake.

    Why This Recipe Works

    This easy baked taco lasagna is a winner because it’s quick, customizable, and packed with flavor. By skipping the browning step, you save time without sacrificing taste. It’s a versatile dish that can be adapted to suit your family’s preferences, making it a reliable go-to for any night of the week.


    Pairing Suggestions

    This taco lasagna pairs perfectly with:

    • Mexican Corn Salad: A fresh and zesty side dish.
    • Guacamole and Chips: For a fun appetizer or snack.
    • Cilantro Lime Rice: A flavorful addition to your meal.

    To make this recipe even easier, here are a few tools and ingredients I recommend:

    • Taco Seasoning: High-quality seasoning for the best flavor. Buy it here.
    • Baking Dish: A durable 9×13-inch dish for even baking. Buy it here.
    • Tortilla Warmer: Keep your tortillas soft and warm. Buy it here.

    Easy Baked Taco Lasagna

    A quick, cheesy, and flavorful dinner that’s perfect for busy nights!

    • 9×13-inch baking dish
    • Mixing bowl
    • Foil
    • 1 lb ground beef
    • 1 packet taco seasoning
    • 1 cup salsa
    • 8-10 small flour tortillas
    • 2 cups shredded cheese
    • Optional toppings: sour cream (diced tomatoes, green onions, cilantro)
    1. Preheat oven to 375°F (190°C).
    2. Mix ground beef, taco seasoning, and salsa in a bowl.
    3. Layer meat mixture, tortillas, and cheese in a baking dish.
    4. Cover with foil and bake for 25 minutes.
    5. Uncover and bake for 10-15 minutes until cheese is golden.
    6. Let cool slightly, then serve with toppings.
    Main Course, main dish
    Mexican-American
    easy baked taco lasagna, family-friendly meals, no browning ground beef, quick dinner recipe

    Have you tried this easy baked taco lasagna recipe? Share your thoughts in the comments below! Don’t forget to pin this recipe for later and follow us for more delicious ideas. Happy cooking!

  • 5 Reasons Beef Bouillon Powder is the Secret to Perfect Brisket (Easy Recipe Inside!)

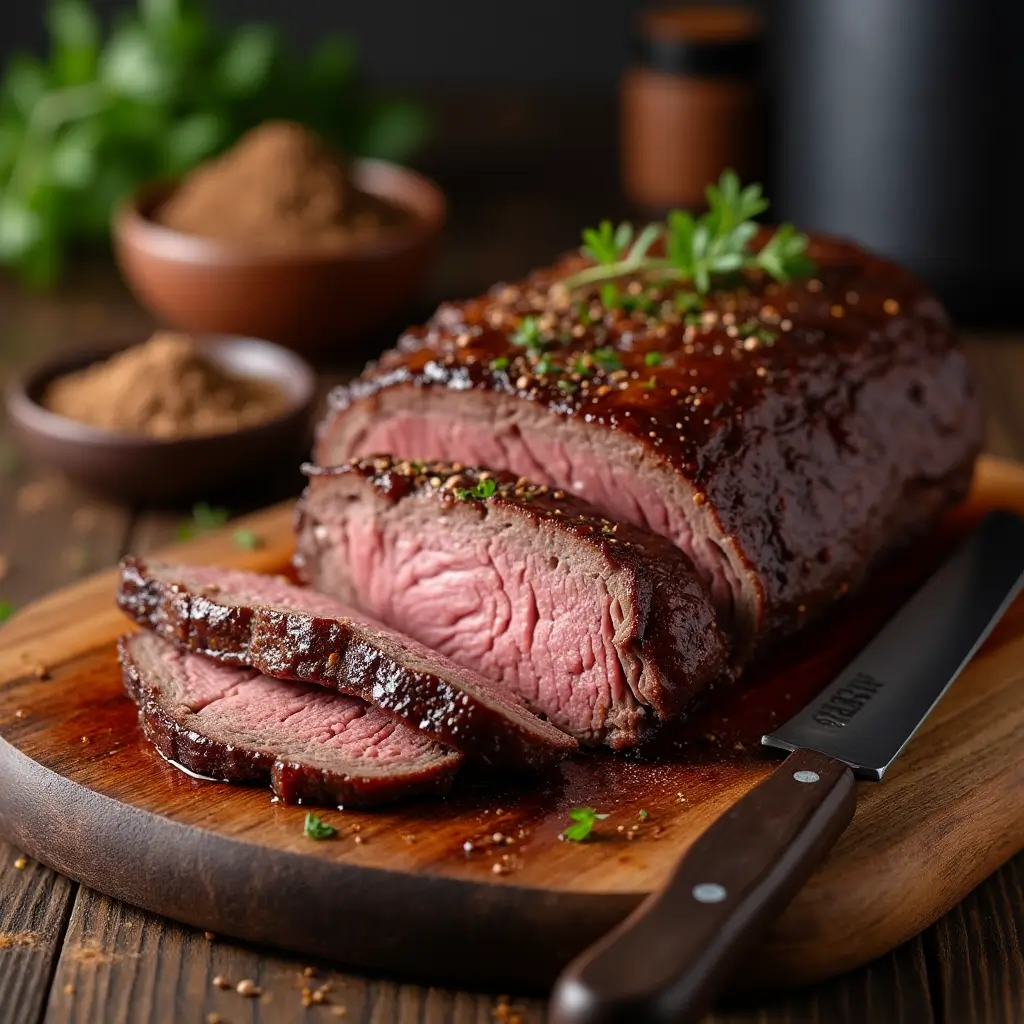
    5 Reasons Beef Bouillon Powder is the Secret to Perfect Brisket (Easy Recipe Inside!)

    Why You’ll Love This Beef Bouillon Powder Brisket Recipe

    If you’ve ever struggled to make brisket that’s tender, juicy, and packed with flavor, this recipe is your answer. The secret? Beef bouillon powder. This humble ingredient adds a rich, savory depth that elevates your brisket to restaurant-quality levels. Whether you’re smoking, roasting, or slow-cooking, this recipe guarantees a melt-in-your-mouth result every time. Perfect for family dinners, BBQs, or special occasions, this brisket will have everyone asking for seconds.


    What Makes Beef Bouillon Powder a Game-Changer?

    Beef bouillon powder is a concentrated blend of beef flavor, salt, and spices. It’s a pantry staple that enhances the natural taste of beef while adding a savory umami kick. When used in brisket, it creates a flavorful crust (or bark) and infuses the meat with moisture and richness. Plus, it’s incredibly easy to use—no need for complicated marinades or brines.


    Ingredients You’ll Need

    Here’s what you’ll need to make this mouthwatering beef bouillon powder brisket:

    • 4-5 lbs beef brisket (flat cut or point cut)
    • 2 tablespoons beef bouillon powder
    • 1 tablespoon smoked paprika
    • 1 tablespoon garlic powder
    • 1 tablespoon onion powder
    • 1 tablespoon black pepper
    • 1 teaspoon cayenne pepper (optional, for heat)
    • 2 tablespoons olive oil (for coating)
    • 1 cup beef broth (for braising)

    Step-by-Step Instructions

    1. Prep the Brisket: Pat the brisket dry with paper towels. This helps the seasoning stick better.
    2. Make the Rub: In a small bowl, mix the beef bouillon powder, smoked paprika, garlic powder, onion powder, black pepper, and cayenne pepper (if using).
    3. Season the Brisket: Rub the brisket generously with olive oil, then coat it evenly with the seasoning mix. Make sure to cover all sides.
    4. Let It Rest: Allow the seasoned brisket to sit at room temperature for 30 minutes. This helps the flavors penetrate the meat.
    5. Preheat Your Oven or Smoker: If using an oven, preheat to 275°F (135°C). For a smoker, set it to 225°F (107°C).
    6. Cook the Brisket: Place the brisket in a roasting pan or on the smoker rack. Pour beef broth into the pan (for oven cooking) to keep the meat moist. Cook for 6-8 hours, or until the internal temperature reaches 195°F (90°C).
    7. Rest and Slice: Remove the brisket from the heat and let it rest for 30 minutes. This allows the juices to redistribute. Slice against the grain for maximum tenderness.

    Tips for the Best Brisket

    • Choose the Right Cut: Look for a brisket with good marbling for extra flavor and tenderness.
    • Low and Slow: Cooking at a low temperature ensures the meat stays juicy and tender.
    • Use a Meat Thermometer: This is the best way to ensure your brisket is perfectly cooked.

    Why This Recipe Works

    This beef bouillon powder brisket recipe is foolproof because it combines simplicity with incredible flavor. The bouillon powder enhances the beef’s natural taste, while the slow cooking process ensures a tender, fall-apart texture. It’s a crowd-pleaser that’s perfect for both beginners and seasoned cooks.


    Pairing Suggestions

    This brisket pairs beautifully with:

    • Creamy Mashed Potatoes: A classic comfort food combo.
    • Grilled Vegetables: Add a fresh, smoky side.
    • Cornbread: Perfect for soaking up the juices.

    To make this recipe even easier, here are a few tools and ingredients I recommend:

    • Meat Thermometer: Essential for checking doneness. Buy it here.
    • Beef Bouillon Powder: High-quality bouillon for the best flavor. Buy it here.
    • Roasting Pan: Perfect for oven-cooked brisket. Buy it here.

    Beef Bouillon Powder Brisket

    Tender, juicy, and packed with flavor, this brisket is a must-try for any meat lover!

    • Roasting pan or smoker
    • Meat thermometer
    • Mixing bowl
    • 4-5 lbs beef brisket
    • 2 tablespoons beef bouillon powder
    • 1 tablespoon smoked paprika
    • 1 tablespoon garlic powder
    • 1 tablespoon onion powder
    • 1 tablespoon black pepper
    • 1 teaspoon cayenne pepper (optional)
    • 2 tablespoons olive oil
    • 1 cup beef broth
    1. Pat the brisket dry and coat with olive oil.
    2. Mix the seasonings and rub them onto the brisket.
    3. Let the brisket rest for 30 minutes.
    4. Preheat oven or smoker to 275°F (135°C) or 225°F (107°C).
    5. Cook the brisket for 6-8 hours, basting with beef broth if needed.
    6. Rest for 30 minutes before slicing.
    Main Course, main dish
    American
    beef bouillon powder brisket, easy brisket recipe, smoked brisket, tender brisket

    Have you tried this beef bouillon powder brisket recipe? Share your thoughts in the comments below! Don’t forget to pin this recipe for later and follow us for more delicious ideas. Happy cooking!