

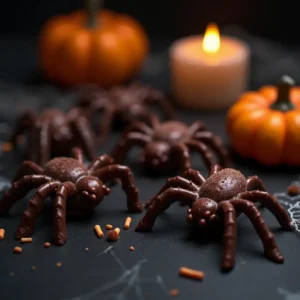
Are you ready to whip up a treat that is as fun as it is delicious? In this guide, you will learn how to make chocolate spiders—a recipe that brings a touch of spooky magic to your dessert table. Whether you are preparing for a Halloween bash or just want to surprise your family with a unique treat, this recipe is your go-to guide. Let’s get started!
Why You Will Love Making Chocolate Spiders
Imagine biting into a piece of rich, smooth chocolate that looks as playful as it is eerie. You will love making these chocolate spiders because they are:
- Fun and Easy: The recipe is simple, with clear steps that guide you through each stage.
- Perfect for Celebrations: Great for Halloween parties or any fun family gathering.
- Unique: A twist on traditional desserts, these treats add a spark of creativity to your table.
- Customizable: You can add your favorite flavors or even a little crunch to make them extra special.
You can feel like a real chef as you transform plain chocolate into tiny, spooky spiders that will amaze your friends and family. Plus, making your own treats means you know exactly what goes into them—no artificial flavors or extra preservatives!
The Magic Behind Homemade Chocolate Spiders
When you make these chocolate spiders at home, you are not just preparing a dessert; you are creating an experience. Here’s why you should consider making them:
- Healthier Option: Homemade treats let you control the ingredients, ensuring a fresher and more natural taste.
- Budget-Friendly: Skip the expensive bakery prices and make your treats at home.
- Creative Expression: Use your creativity to decorate and shape the spiders, making each treat unique.
- Family Fun: Involve your kids or friends in the process for a memorable cooking session.
For more fun dessert ideas, you might want to check out our Spider Web Cookie Stamp Cookies and Jovial Chocolate Cake recipes. These treats are sure to get everyone in a festive mood!
Step-by-Step Guide to Making Chocolate Spiders
Let’s roll up your sleeves and dive into the art of crafting your very own chocolate spiders. This recipe is laid out step by step to ensure that even if you’re new to the kitchen, you can follow along with ease.
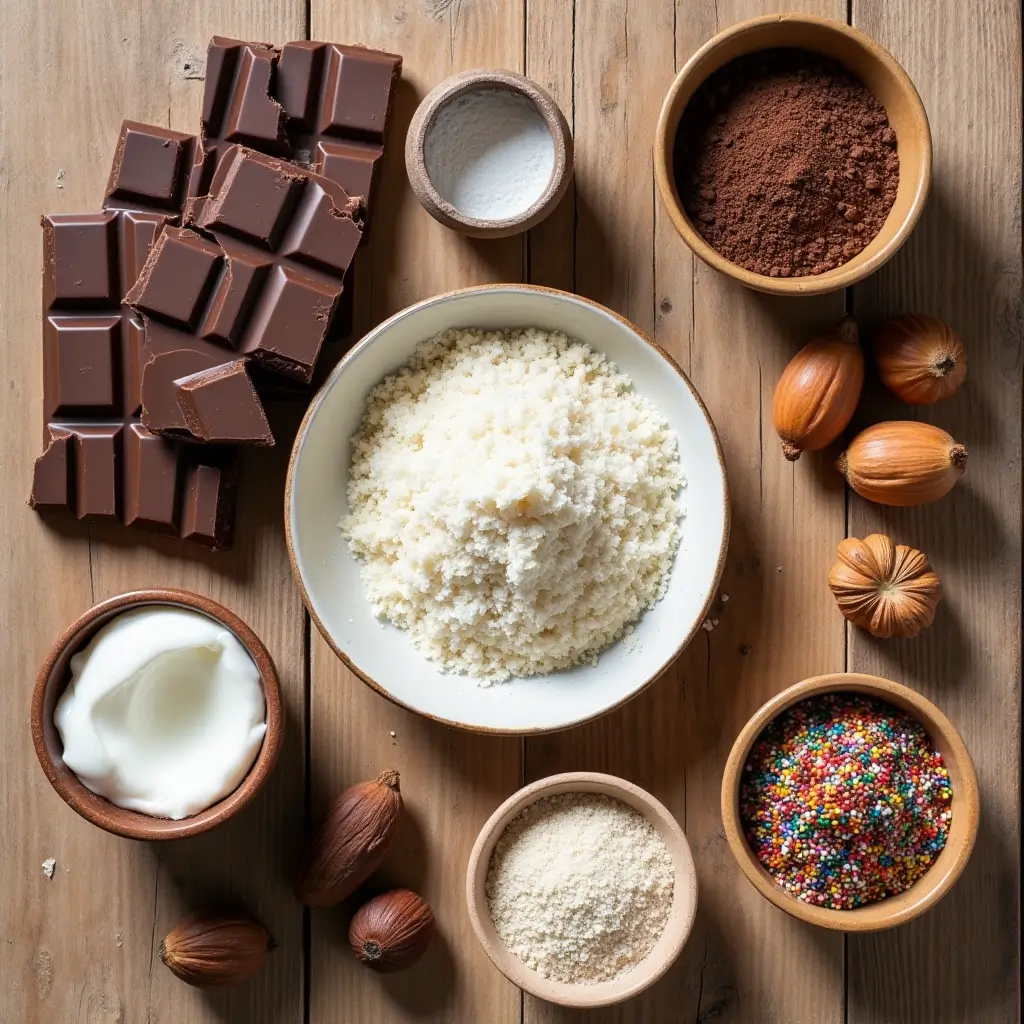
1. Gather Your Ingredients and Equipment
Before you begin, make sure you have all the necessary ingredients and tools. This will help your process go smoothly and quickly.
What You Need:
- High-Quality Chocolate: Use dark or milk chocolate based on your preference.
- Mold for Spiders: A spider-shaped mold works best, but you can also use a simple silicone mold and get creative.
- Mixing Bowls: For melting and mixing the chocolate.
- Spatula: To stir the chocolate.
- Refrigerator: To set your chocolate spiders.
- Optional Add-ins: Sprinkles, crushed nuts, or edible glitter for extra flair.
Pro Tip: If you don’t have a spider mold, check out these amazing spooky chocolate molds available online. They are perfect for creating intricate designs and can be used for many other chocolate treats as well.
2. Melt the Chocolate
Start by breaking your chocolate into small pieces. Place them in a microwave-safe bowl or a double boiler. If you are using a microwave, heat in short bursts (about 20–30 seconds) and stir in between. This helps prevent the chocolate from burning.
- Tip: Stir slowly and let the heat do its work. You will see the chocolate turn into a smooth, glossy liquid.
3. Prepare the Mold
While the chocolate is melting, get your mold ready. If you are using a silicone mold, ensure it is clean and dry. A light spray of non-stick cooking spray can help the chocolate release easily once it is set.
- Note: If you want to get extra creative, use a toothpick or a small brush to add swirls of a different flavor (like white chocolate or caramel) into the mold before pouring in the main chocolate.
4. Pour the Chocolate Into the Mold
Slowly pour the melted chocolate into your mold. Make sure you fill every part of the mold, especially in the tiny details of the spider legs and body. Tap the mold lightly on the counter to remove any air bubbles.
- Tip: Fill the mold just enough so that when you turn it upside down, the chocolate does not overflow.

5. Let It Set
Place the filled mold in your refrigerator for about 20-30 minutes. You want the chocolate to harden completely so that the delicate spider shapes remain intact.
- Reminder: Patience is key here. Let the chocolate set fully before attempting to remove it from the mold.
6. Unmold Your Chocolate Spiders
Once the chocolate is solid, gently remove the spiders from the mold. If any pieces are sticking, give the mold a little twist or gently press from the back. Now, you have your very own chocolate spiders ready to serve!
- Cheer: Look at your creation! Each spider is a tiny masterpiece that you made with your own hands.
Tips & Tricks for Perfect Chocolate Spiders
To ensure your chocolate spiders turn out perfectly every time, here are a few handy tips:
- Temperature Matters: Keep your work area cool. Warm surroundings can cause the chocolate to melt before it sets.
- Clean Molds: Ensure that your molds are free from any water or residue, as even a small drop can ruin the texture.
- Decoration Ideas: Add a little edible glitter or a sprinkle of sea salt on top to give your spiders a gourmet look.
- Experiment with Flavors: Try using flavored chocolates like mint or orange for a twist on the classic taste.
For more detailed tips on working with chocolate, check out this helpful guide on Food Network’s Chocolate Tips.
Affiliate Spotlight: The Best Tools for Your Kitchen Creations
Creating the perfect chocolate spiders is all about using the right tools. One product we highly recommend is a set of high-quality silicone molds that are designed for intricate designs. These molds are not only perfect for chocolate spiders but are versatile enough to use for cakes, jellies, and more.
Why You’ll Love It:
- Durable and Reusable: These molds are built to last, saving you money over time.
- Easy Release: With a non-stick surface, your treats come out easily without any mess.
- Creative Designs: They come in various shapes that can add a festive touch to any dessert.
Ready to up your kitchen game? Check out these top-rated silicone molds on Amazon now and turn every dessert into a work of art!
More Tasty Ideas from Fouzia’s Kitchen
If you love experimenting with fun desserts, be sure to explore more recipes on Fouzia’s Kitchen. Here are a few that might catch your eye:
- Gipfeli Recipe: A light and flaky pastry treat.
- Caribbean Festival Rum Cake: A burst of tropical flavors in every bite.
- Braided Chocolate Chip Brioche: A twist on a classic favorite.
- Pickle Pie Pizza: For those who love to mix sweet with savory.
Each recipe is crafted with care and is perfect for food lovers looking to try something new and exciting.
Chocolate Spiders
Equipment
- Spider-shaped silicone mold (or any small silicone mold)
- Microwave-safe bowl or double boiler
- Mixing bowl
- Spatula
- Refrigerator
Ingredients
- 300 grams of high-quality chocolate dark or milk, based on your taste
- 1 teaspoon of coconut oil optional, for a shinier finish
- Optional: Edible glitter sprinkles, or crushed nuts for decoration
Instructions
Prepare Your Chocolate:
- Break the chocolate into small pieces.
- Place in a microwave-safe bowl or double boiler.
Melting Process:
- Heat the chocolate in short bursts (20-30 seconds), stirring in between until smooth.
- If using a double boiler, stir continuously until melted.
Prepare the Mold:
- Ensure your mold is clean and dry.
- Lightly spray with non-stick cooking spray if needed.
Fill the Mold:
- Pour the melted chocolate carefully into the mold, filling all the nooks and crannies.
- Tap the mold on the counter gently to remove air bubbles.
Set the Chocolate:
- Place the mold in the refrigerator for 20-30 minutes until the chocolate is hard.
Unmold Carefully:
- Once set, gently remove the chocolate spiders from the mold.
- Decorate with edible glitter, sprinkles, or nuts if desired.
Notes
- Storage: Keep your chocolate spiders in a cool, dry place. Refrigerate if the room is warm.
- Variations: Experiment with flavored chocolates or add a pinch of sea salt on top.
- Decoration Tip: Use a fine sieve to dust a little cocoa powder or edible glitter for an extra touch of magic.
Final Thoughts
You now have all the tips and instructions you need to create your own delicious chocolate spiders. Remember, the joy of cooking comes from experimenting and adding your personal touch to every recipe. We encourage you to share your creations on social media and tag us at Fouzia’s Kitchen. Your feedback and pictures make our community even sweeter!
Do you have any tips or tricks for making spooky treats? Leave your comments below and let us know how your chocolate spiders turned out. If you loved this recipe, please share it with friends and family who might enjoy a fun and festive dessert. Also, sign up for our newsletter to receive more delightful recipes and exclusive kitchen tips directly to your inbox.
For more inspiration and culinary adventures, check out our other recipes like our Golden Stormry Cocktail and Burger Bowl Recipe. Every dish is made with passion, and we can’t wait to see you enjoy them as much as we do.
Now, grab your ingredients, turn on your creativity, and have fun making these spooky yet scrumptious treats. Happy cooking, and may your kitchen be filled with joy and delicious aromas!
By following this detailed guide, you have not only learned how to make stunning chocolate spiders but also discovered new ways to enhance your kitchen skills. Enjoy the process, and remember: every great chef starts with one small step—why not take yours today?
External Resource:
For additional tips on working with chocolate and ensuring a smooth melt, visit Chocolate Academy.
Happy Treat Making!